
FormRelay
Webhook
See the installation steps to learn how to install our app and change the form name
Send "Form submissions" from your Webflow site to any external URL via a POST request by Webhook.
Before you start
- An
https://endpoint that accepts aPOSTwith a JSON body and answers 2xx. Plainhttp://URLs are refused when you save the connection, because submissions would travel unencrypted. Anything other than a 2xx is tried again, up to 3 attempts in total, then logged as failed so you can replay it. - No field mapping is needed — the whole submission is sent as JSON. See Form Field Mapping.
- Optional: add an API key to the connection and FormRelay sends it as
Authorization: Bearer <key>.
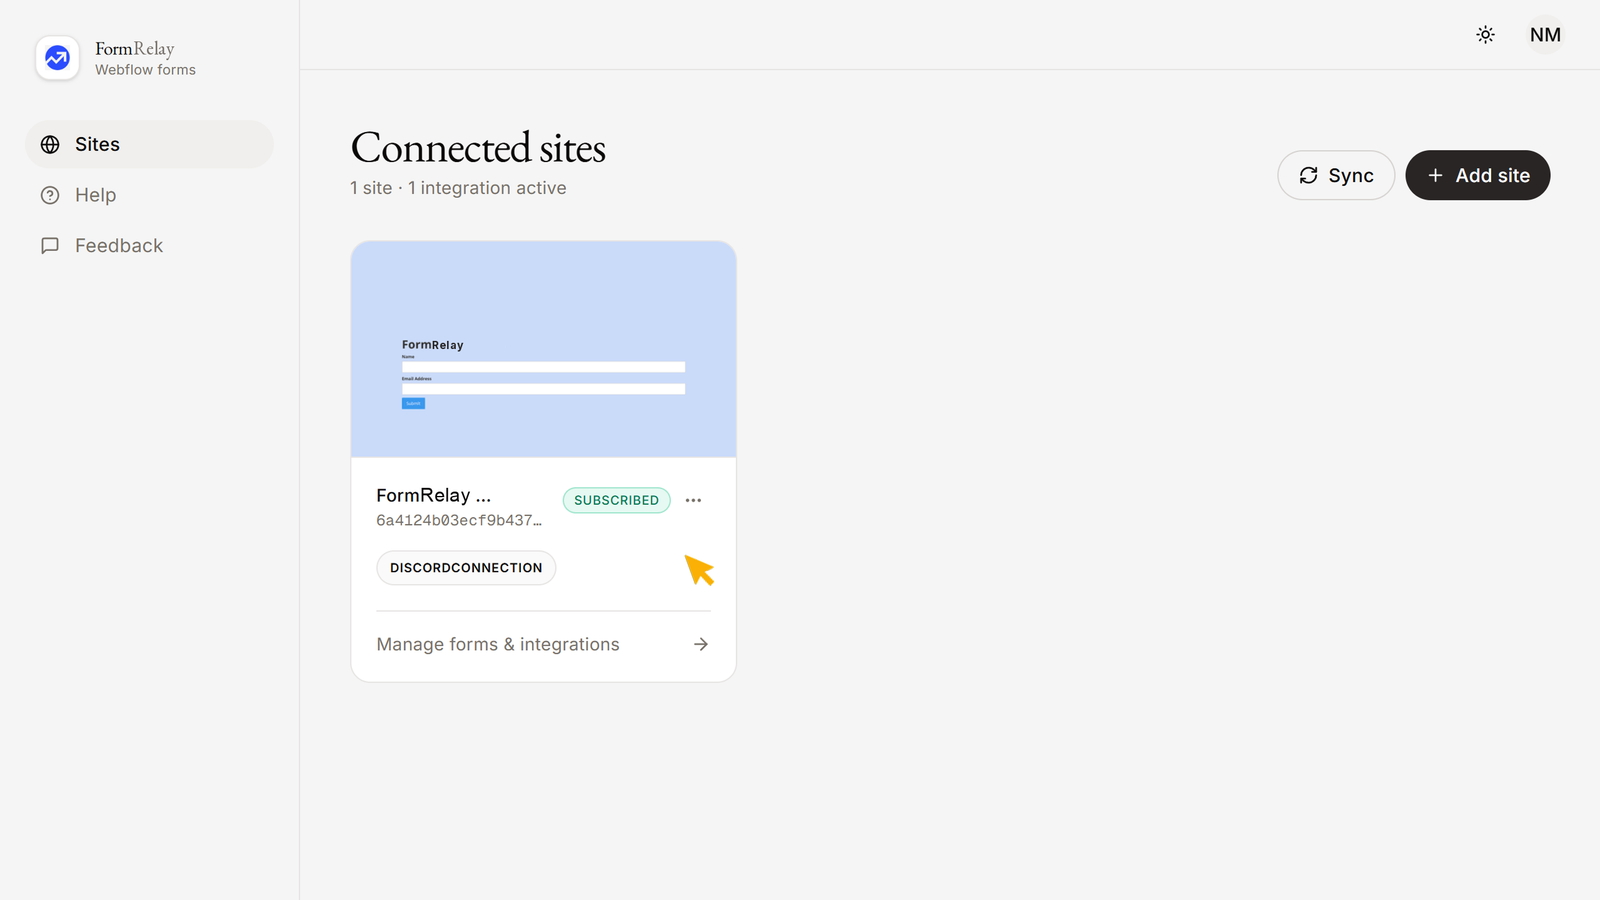
- In your App Dashboard, go to the Sites menu and click on your Authorized Webflow Site.
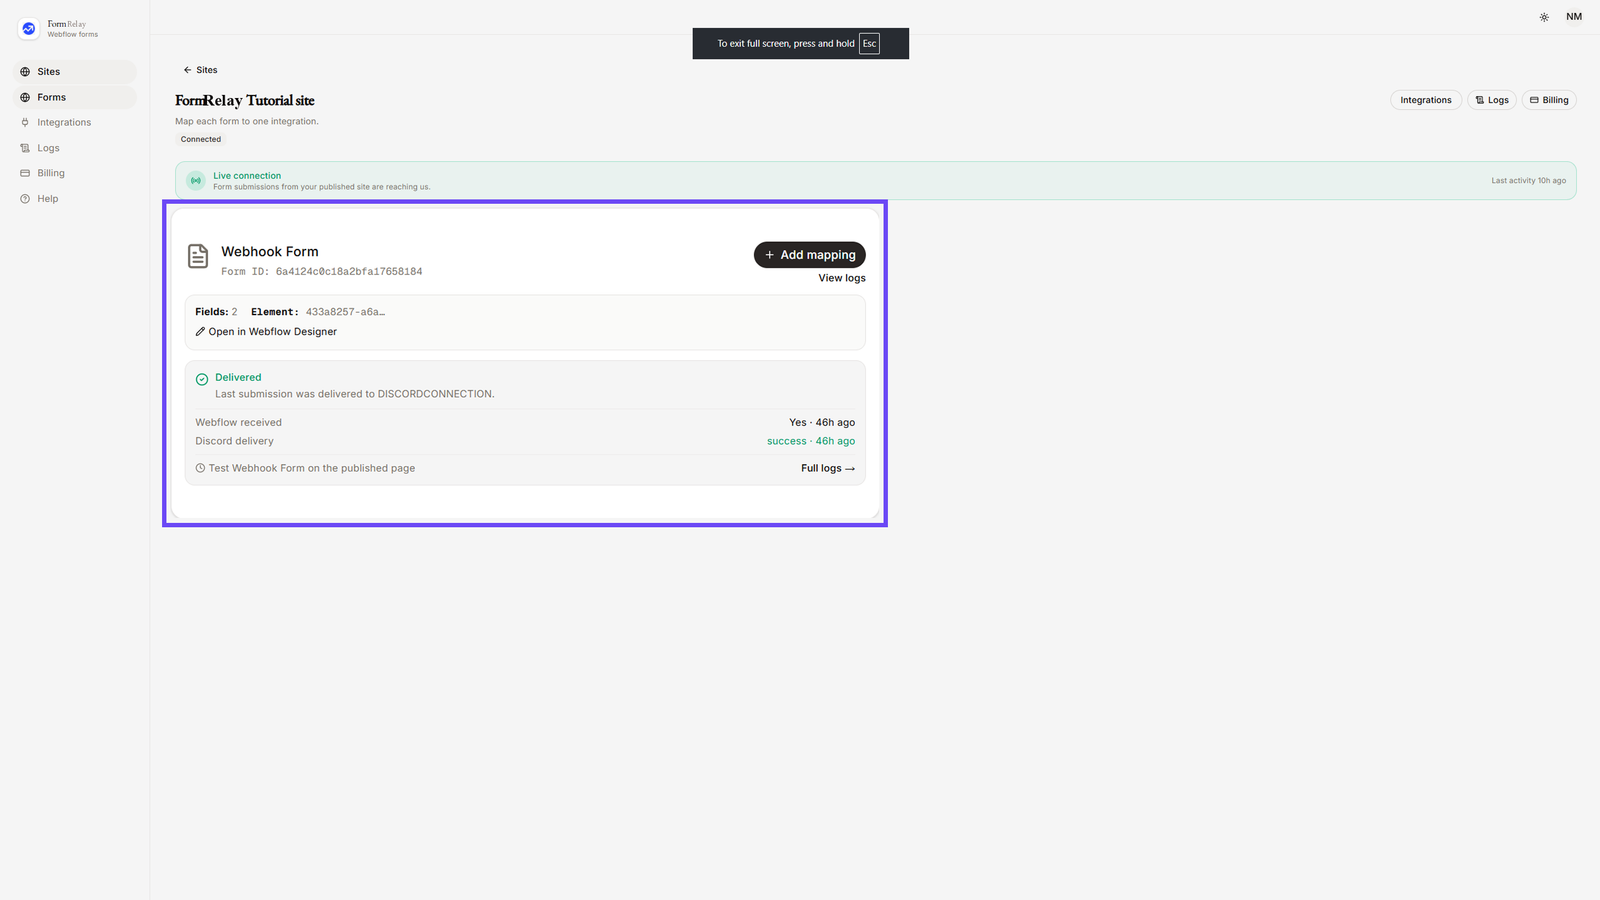
- Here you will see all your forms across the site.
- A form can send to several destinations, but only one of each kind. Adding a second Webhook destination to the same form is not possible; edit the existing one instead.
- From the left-hand menu, click on Integrations. You will see available categories such as:
- Apps & Platforms (Notion, Slack, Discord, Airtable)
- Email & marketing (HubSpot, Mailchimp, Klaviyo, Brevo, MailerLite, EmailOctopus, Moosend, Omnisend, Sender)
- Automation & Webhooks (Webhook, Zapier, Make)
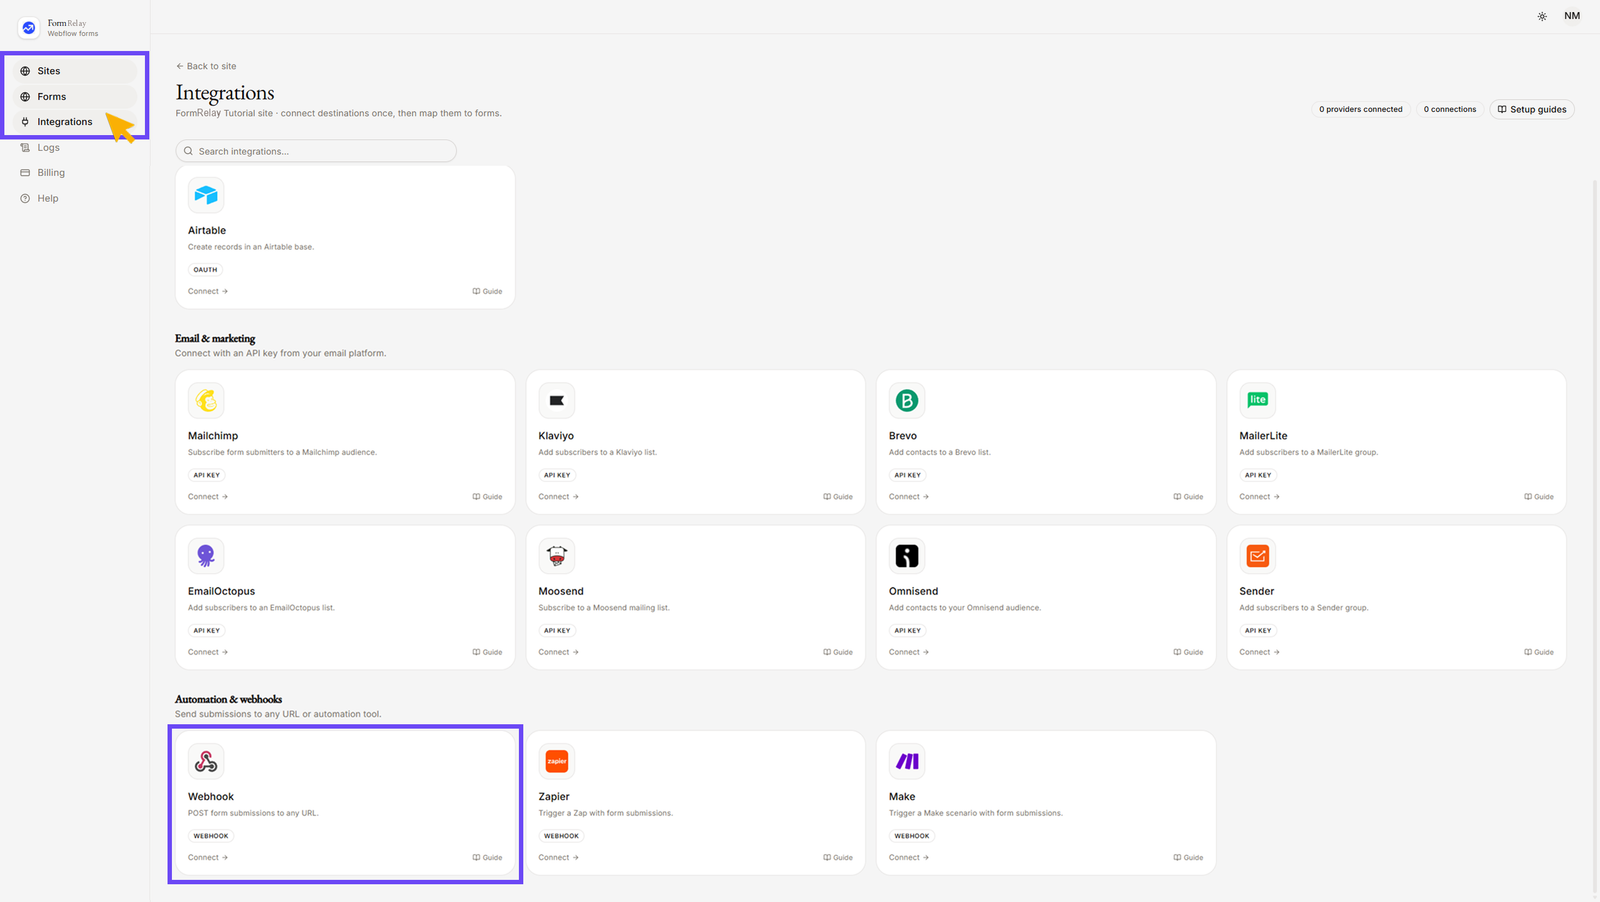
- Under Automation & webhooks, click on Webhook.
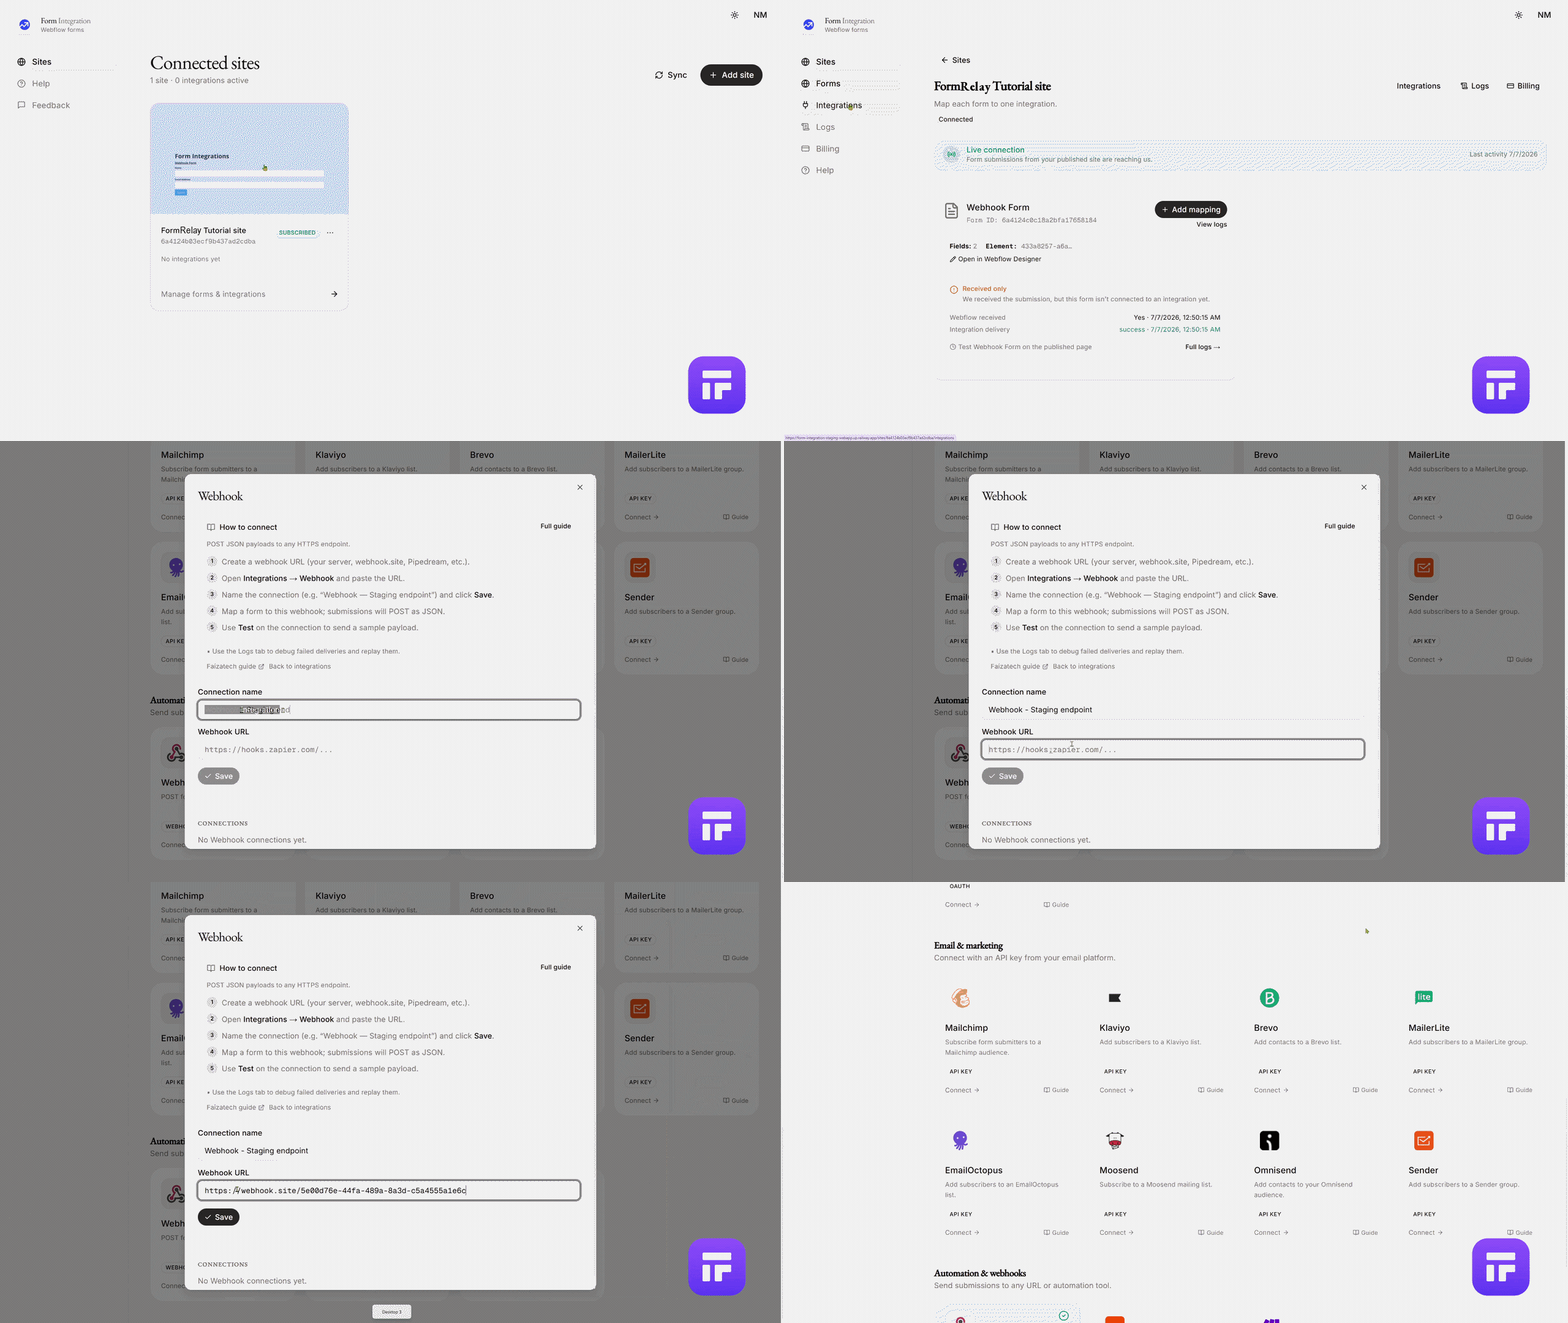
- Give the connection a recognizable name (e.g., “Webhook — Staging endpoint”).
- Paste your Webhook URL. It must start with
https://.
(For details, see section 4: How to get a Webhook URL). - click "Save".
- After clicking "Save", your added Webhook integration will appear under "CONNECTIONS".
- You can edit or delete the connection at any time.
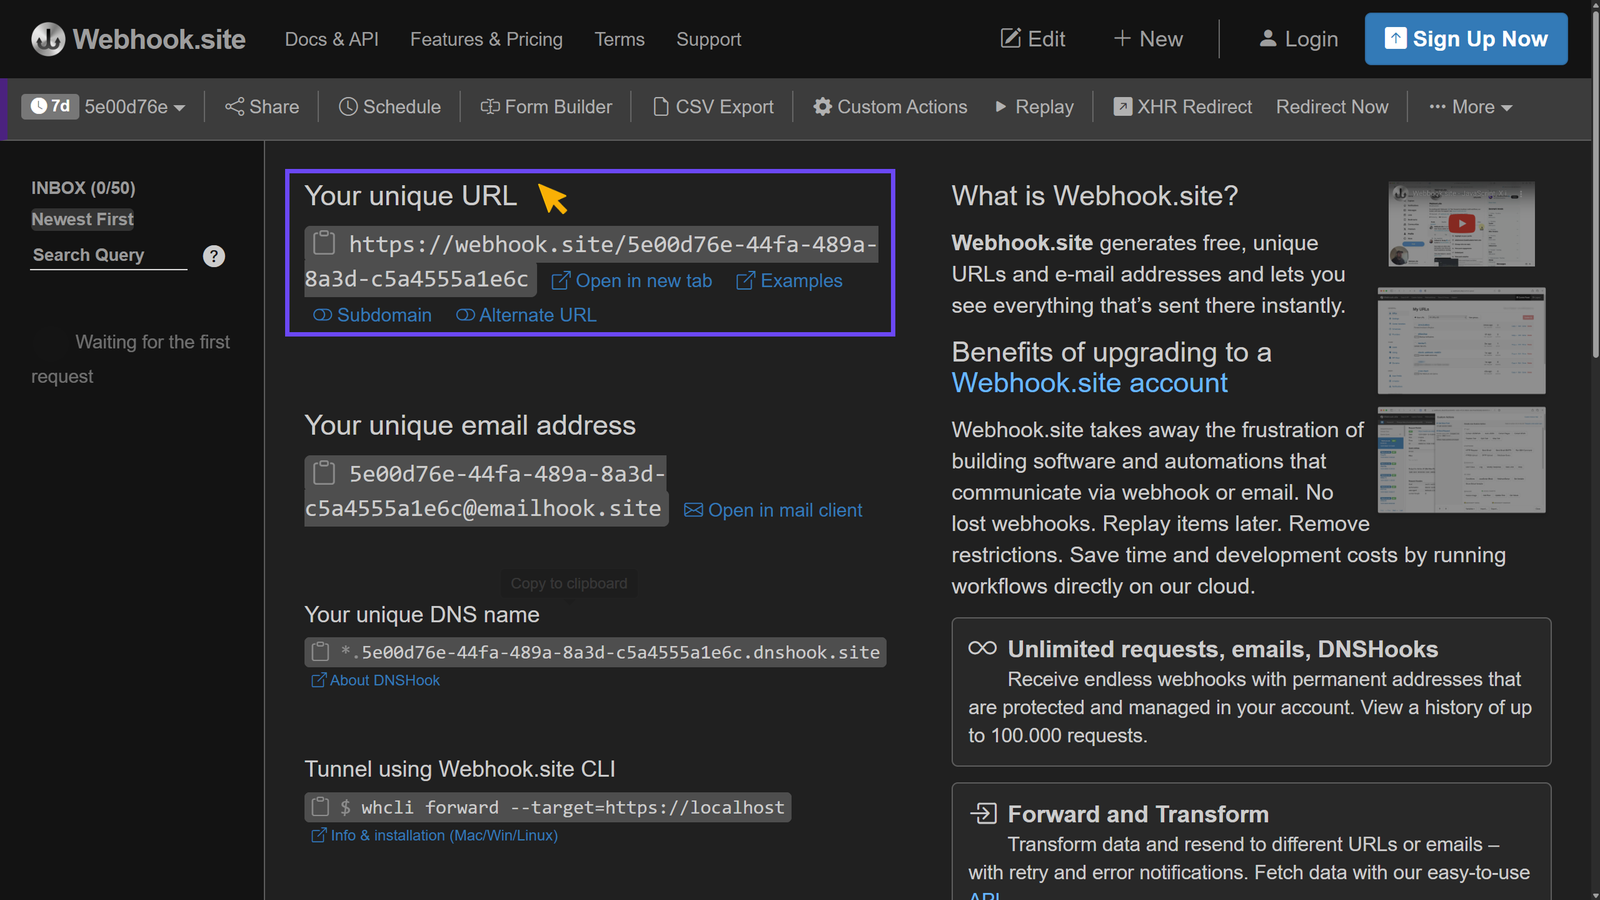
- How to get a Webhook URL.
- The endpoint is yours: a route on your own server, a serverless function, or any tool that gives you an HTTPS URL to
POSTto. It receives the JSON shown under Payload reference below. - Copy the URL and store it securely — you’ll need it to connect your app.
- The endpoint is yours: a route on your own server, a serverless function, or any tool that gives you an HTTPS URL to
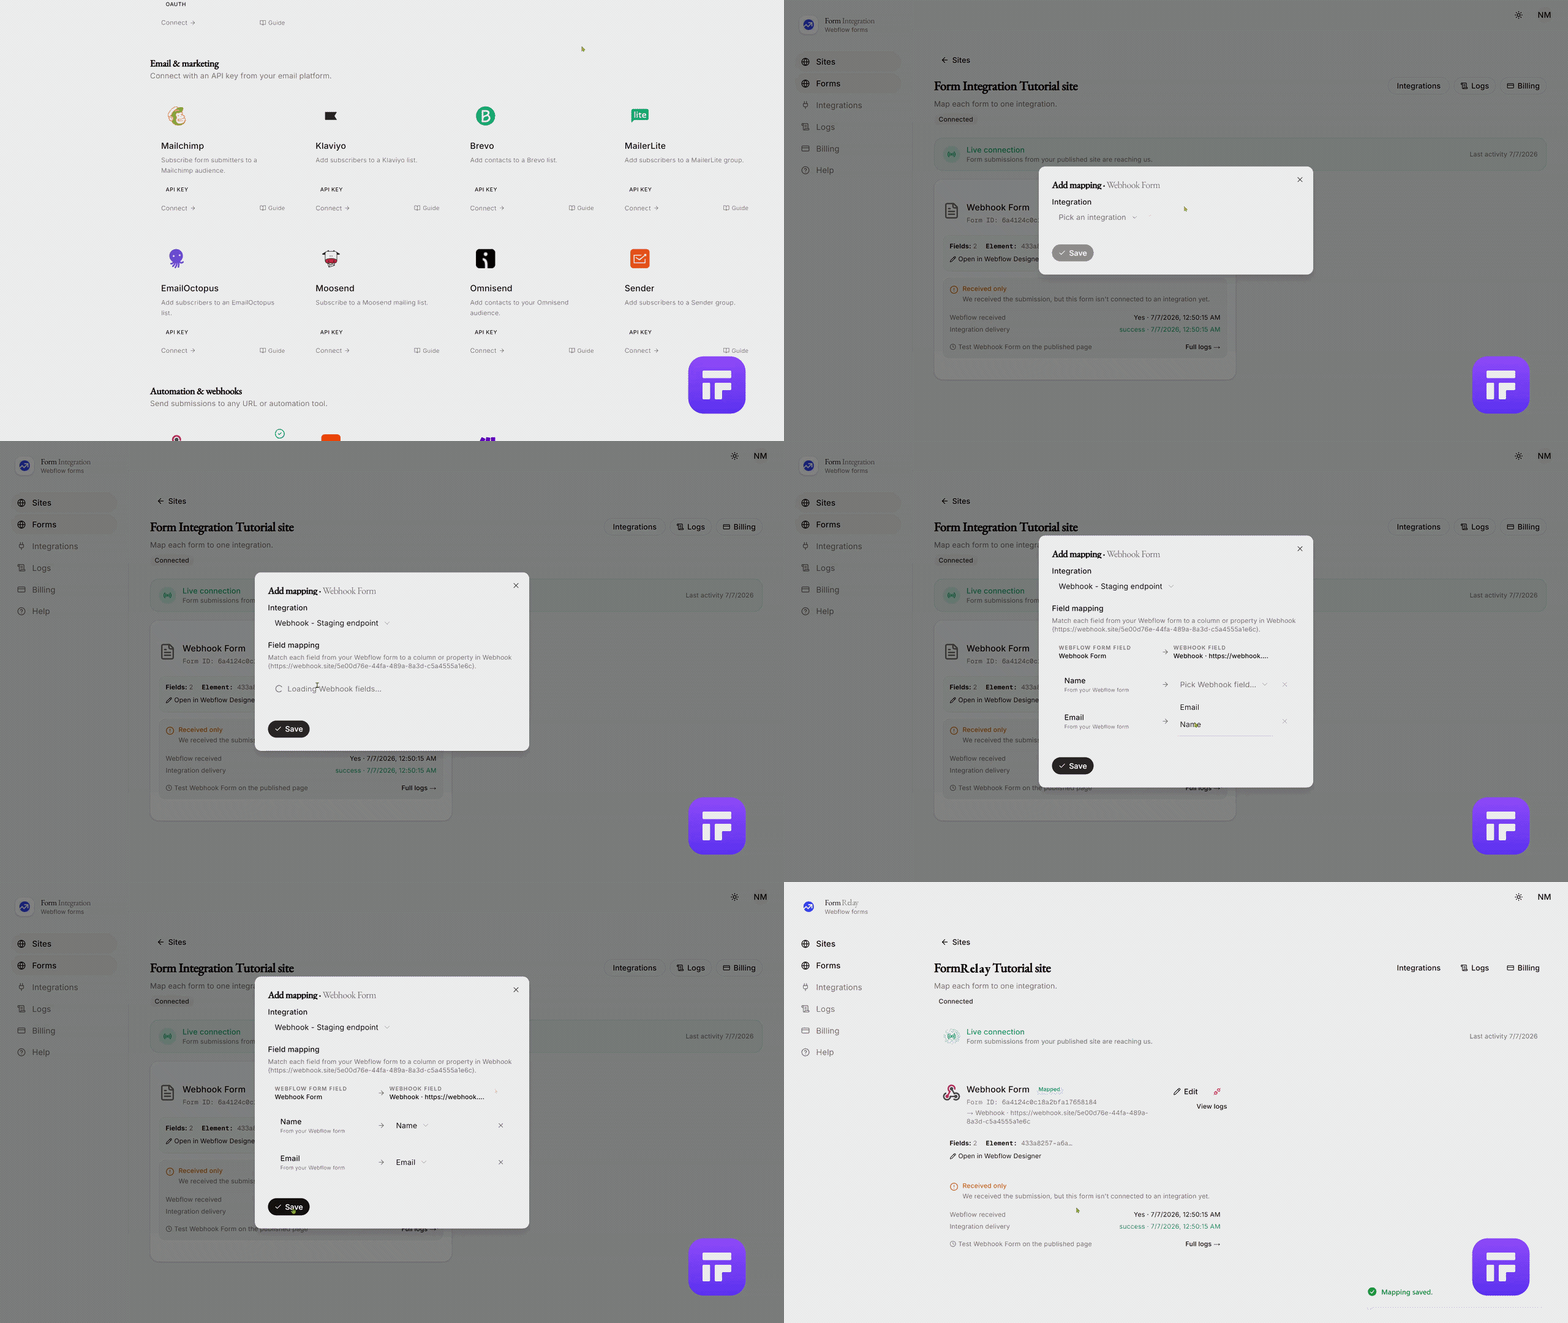
- Go back to the Forms menu.
- Choose a Form from your authorized Webflow site.
- Click "+ Add destination".
- A popup will open with a dropdown for Integration → Pick an integration.
- Select your Webhook integration from the dropdown.
- There is nothing to map: the whole submission is sent as JSON, with the field names Webflow uses.
- Click Save when finished.
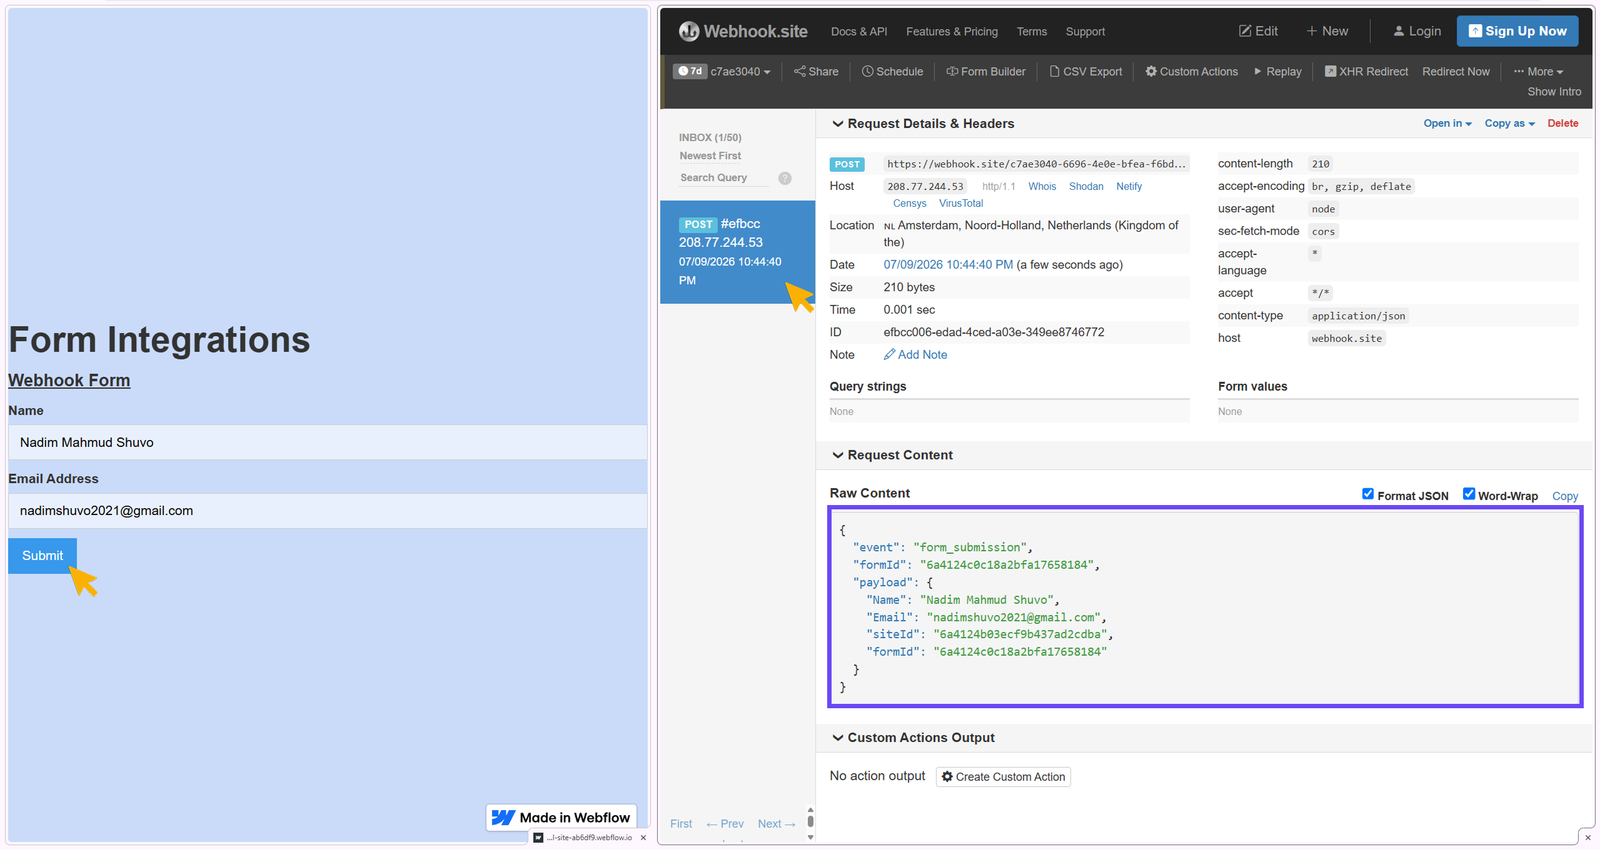
- Test the integration:
- Go to your published Webflow site.
- Fill out and submit the form.
- You will see the data appear in your Webhook Dashboard within a few seconds.
✅ Your Webhook integration is now successfully set up and ready to sync form submissions.
Payload reference
Live form submission (sent on every real submit):
{
    "event": "form_submission",
    "formId": "<webflow-form-id>",
    "payload": {
        "Name": "Jane Doe",
        "Email": "jane@example.com",
        "siteId": "<webflow-site-id>",
        "formId": "<webflow-form-id>"
    }
}
- Sent as
POSTwith"Content-Type": application/json. - Field keys in
payloaduse Webflow field display names.
Test payload (sent when you click the play icon on a saved connection):
{
    "test": true,
    "source": "formrelay",
    "fields": {
        "Name": "Test User",
        "Email": "test@example.com",
        "Message": "Test message from FormRelay"
    },
    "submittedAt": "2026-01-01T00:00:00.000Z"
}
- Includes header
x-formrelay-test: 1.
Troubleshooting
| Issue | What to do |
|---|---|
| Subscribe to enable form delivery | Subscribe the site (7-day free trial) on its Billing page; mappings you save before that are kept and go live once the site is subscribed. |
| Not linked yet / Needs attention on the site page | Click Fix connection to register the Webflow → FormRelay webhook again. |
| No integrations yet — add one from the Integrations page first. | Add a Webhook connection under Integrations before mapping. |
| Test sent shows a non-200 status | Check that your endpoint accepts POST with application/json. |
| Logs show failed for Webhook | Verify the URL is reachable over HTTPS and returns a successful response. |
Still stuck?
Open the site's Logs page in FormRelay. Every attempt is recorded with the destination's own error message, and you can Replay a failed delivery once the cause is fixed. Delivery & Retries explains what the statuses mean.