
FormRelay
EmailOctopus
See the installation steps to learn how to install our app and change the form name
Before you start
- An EmailOctopus account with at least one list.
- An API key — open your account menu → API keys (direct link).
Step 1: Set Up EmailOctopus Integration
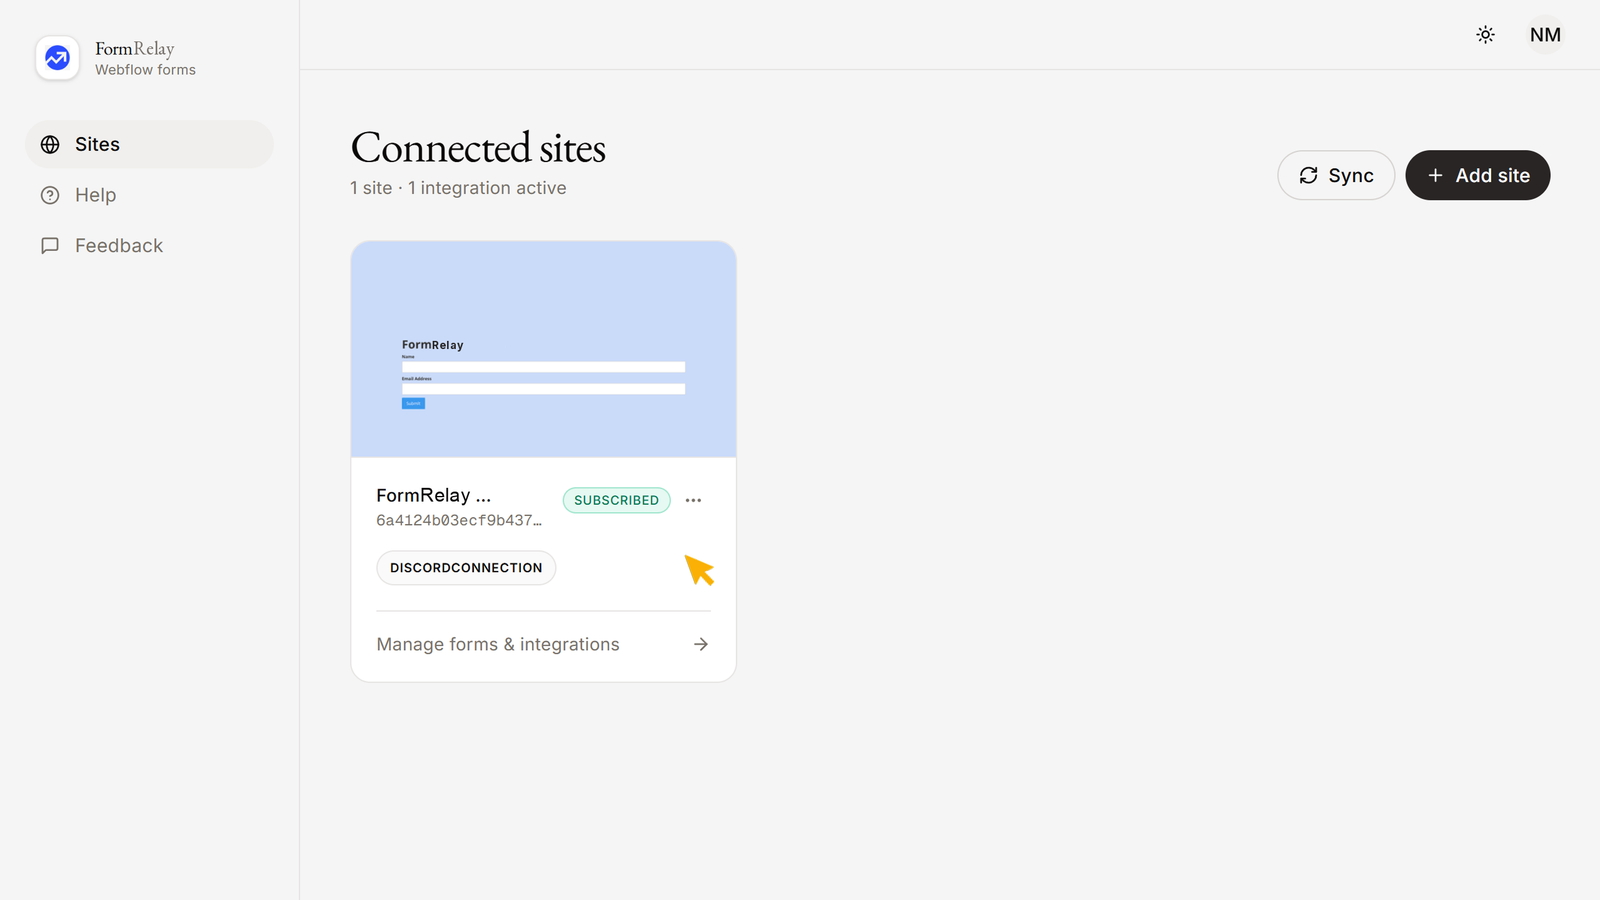
- In your App Dashboard, go to the Sites menu and click on your Authorized Webflow Site.
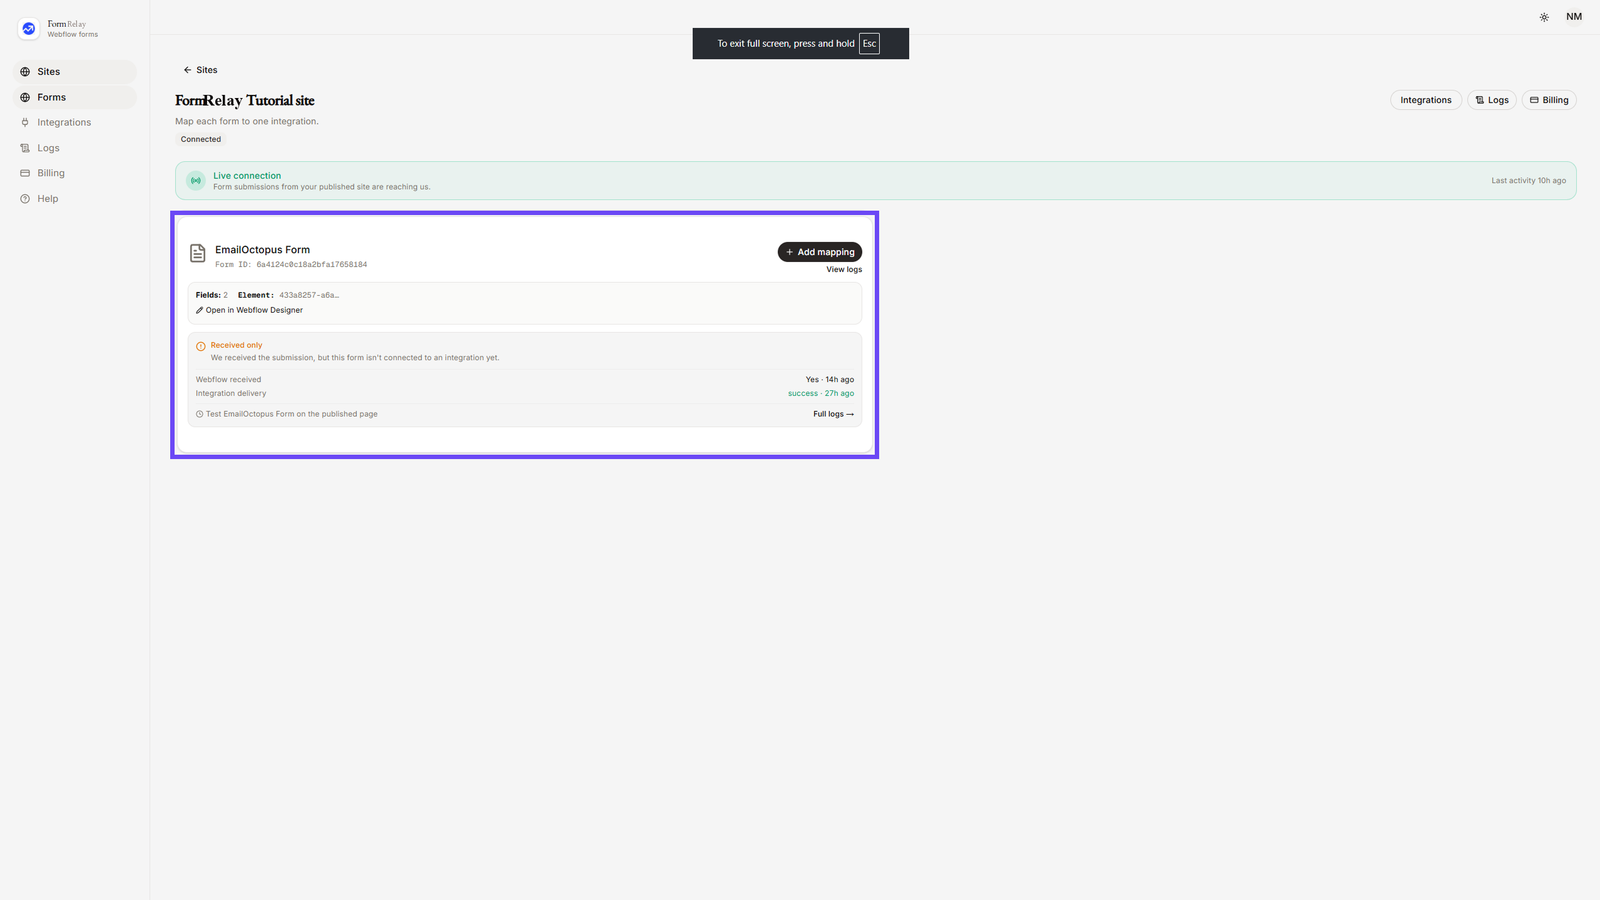
- Here you will see all your forms across the site.
- A form can send to several destinations, but only one of each kind. Adding a second EmailOctopus destination to the same form is not possible; edit the existing one instead.
- From the left-hand menu, click on Integrations. You will see available categories such as:
- Apps & Platforms (Notion, Slack, Discord, Airtable)
- Email & marketing (HubSpot, Mailchimp, Klaviyo, Brevo, MailerLite, EmailOctopus, Moosend, Omnisend, Sender)
- Automation & Webhooks (Webhook, Zapier, Make)
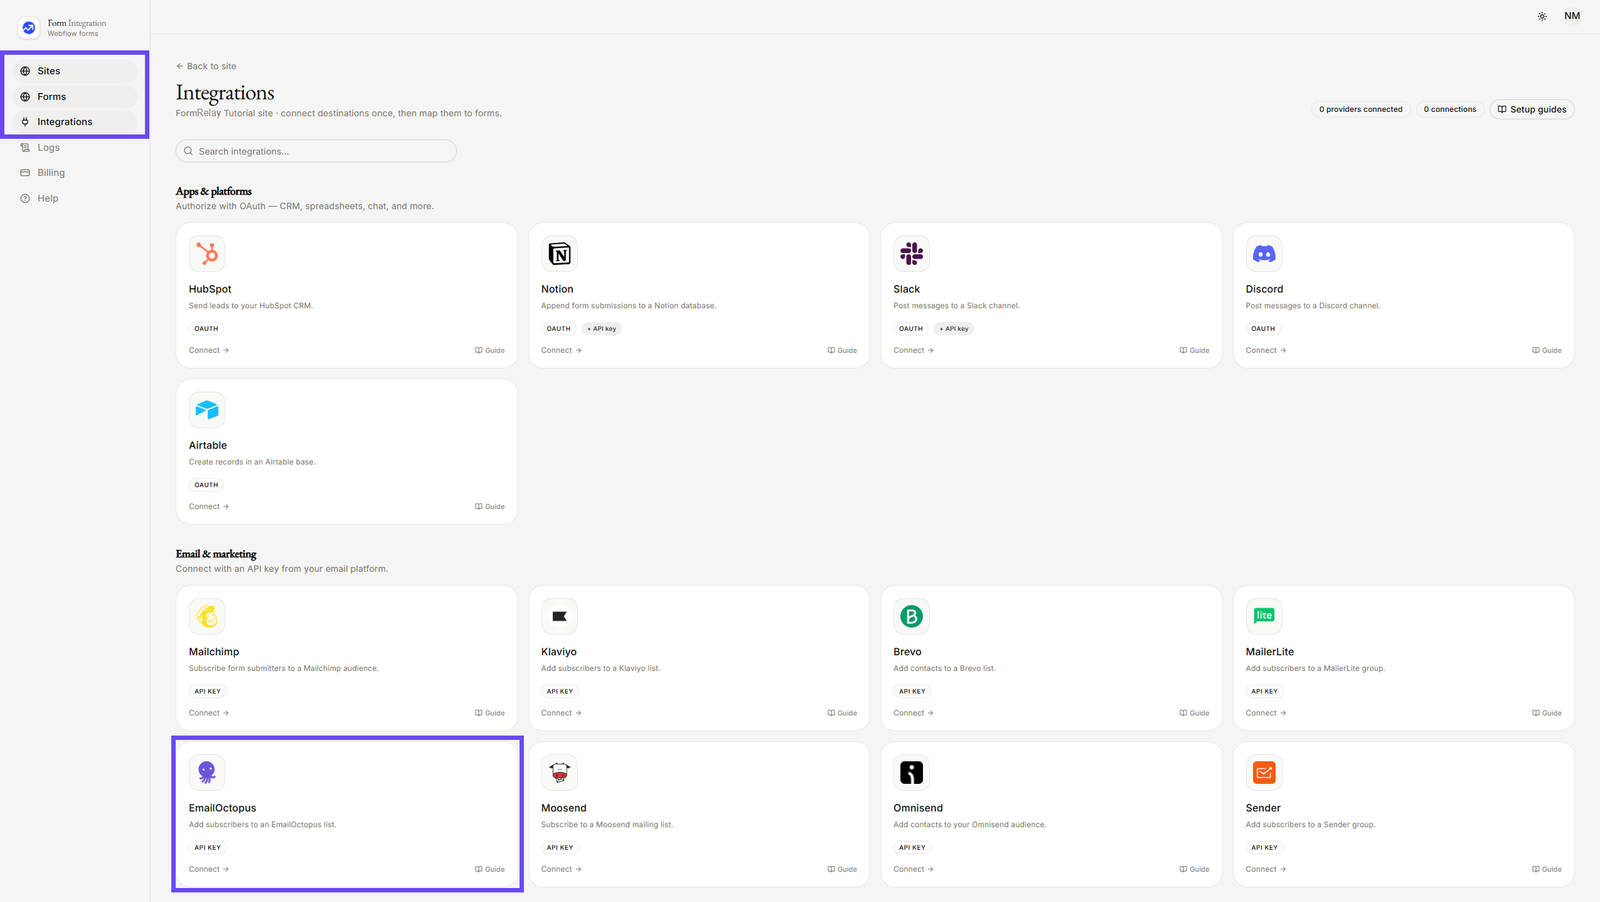
- Under Email & marketing, click on EmailOctopus.
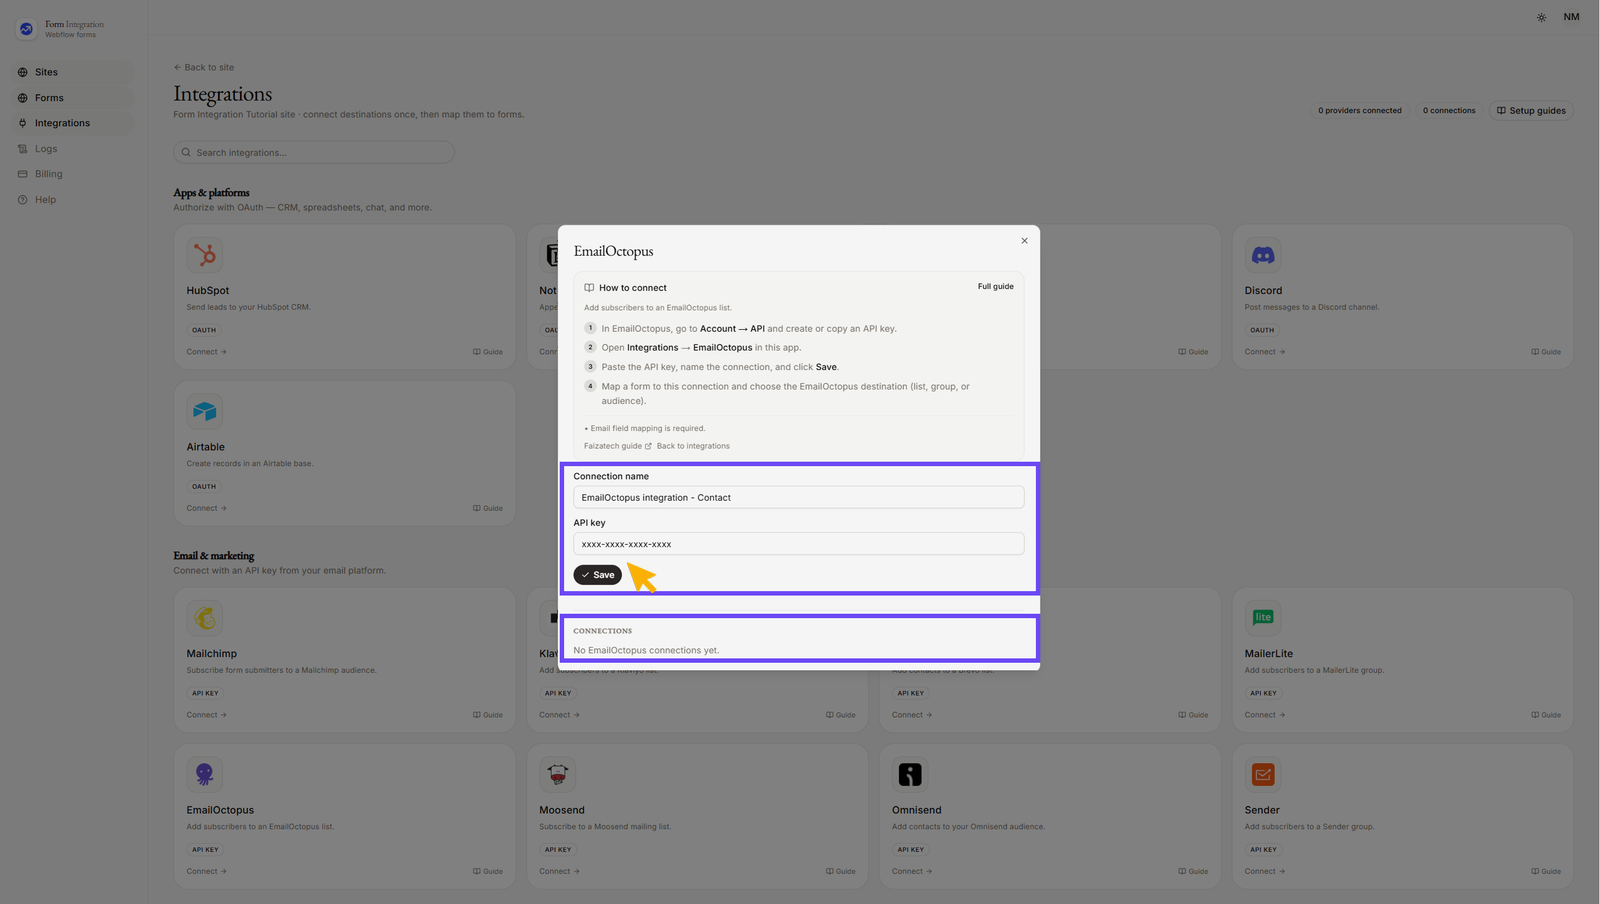
- Give the connection a recognizable name (e.g., “EmailOctopus integration - Contact”).
- Paste your EmailOctopus API key (For details, see section 4: How to create an EmailOctopus API key).
- click "Save".
- After clicking "Save", your added EmailOctopus integration will appear under "CONNECTIONS".
- You can edit or delete the connection at any time.
- How to create an EmailOctopus API key
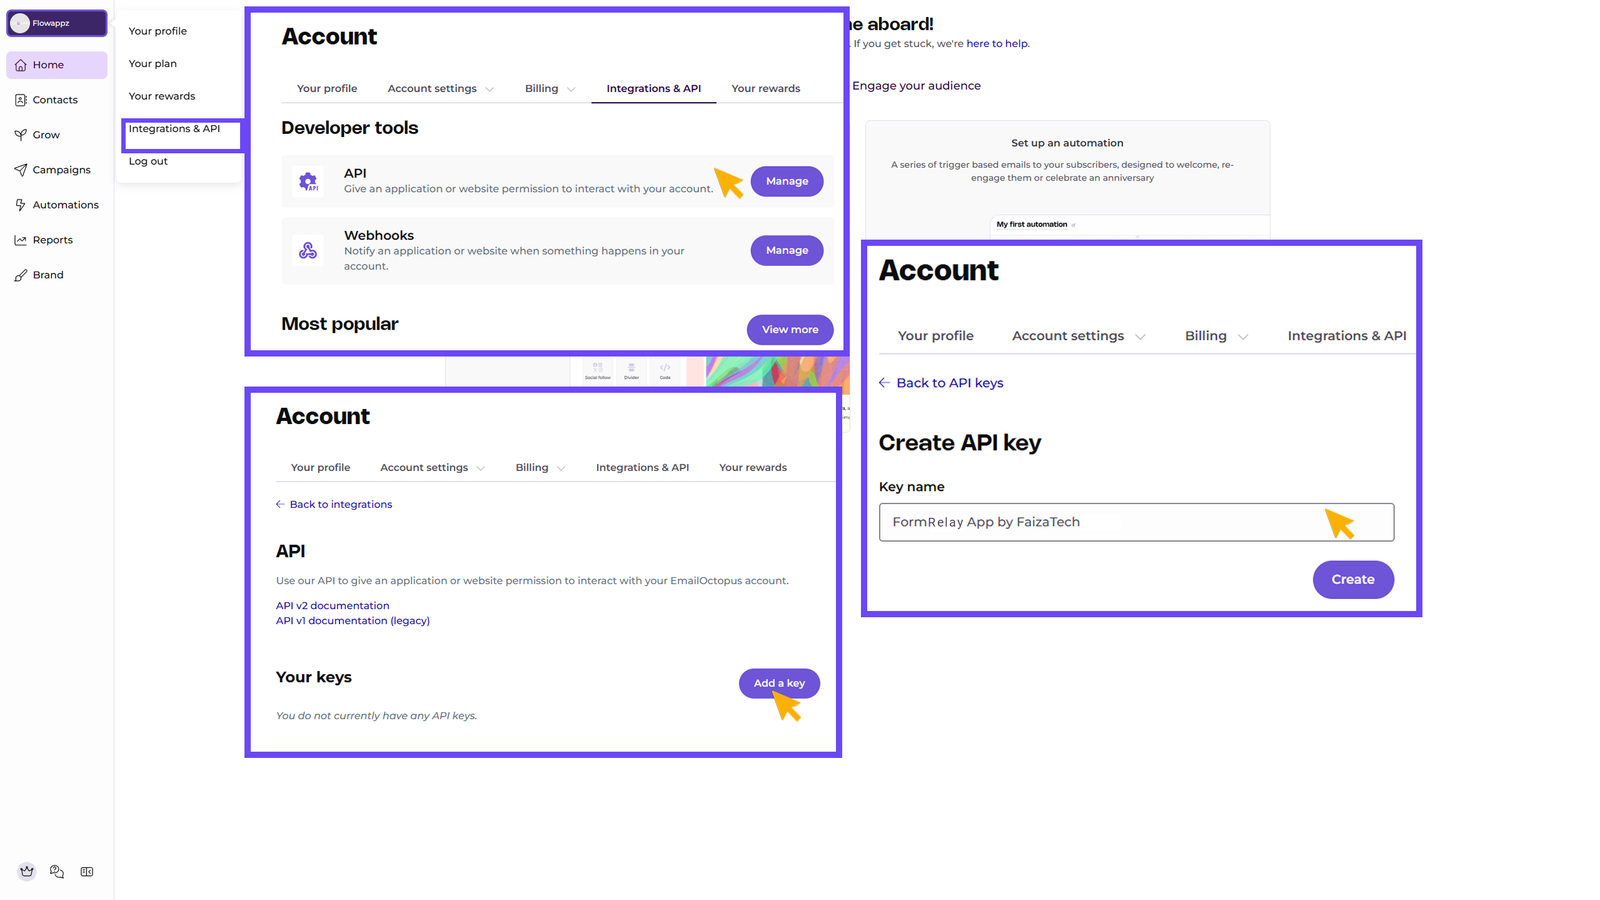
- In your EmailOctopus Dashboard, go to "Integrations & API".
- From the menu, under Developer tools -> API, click Manage.
- Click "Add a key".
- A new page will appear:
- Enter a recognizable Key name (e.g., “FormRelay by Faizatech” ).
- Click "Create".
- Your new API Key will be displayed.
- Copy or download the key and store it securely — you’ll need it to connect your app.
- Go back to the Forms menu.
- Choose a Form from your authorized Webflow site.
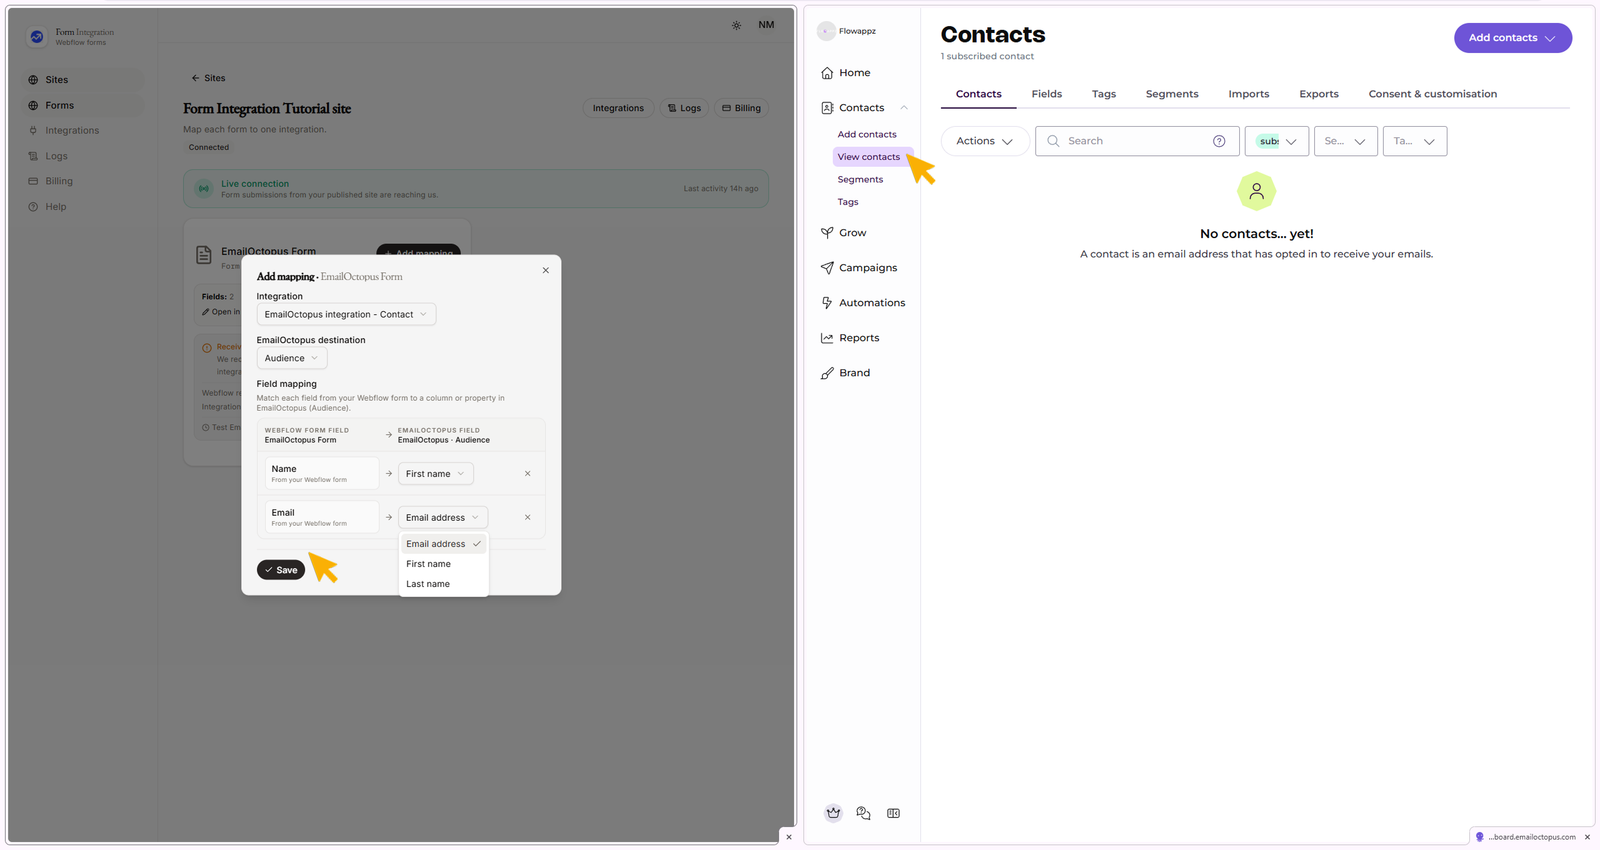
- Click "+ Add destination".
- A popup will open with a dropdown for Integration → Pick an integration.
- Select your EmailOctopus integration from the dropdown.
- Configure Field Mapping by matching each field from your Webflow form to a property in your EmailOctopus Contacts -> View Contacts.
- Click Save when finished.
- Test the integration:
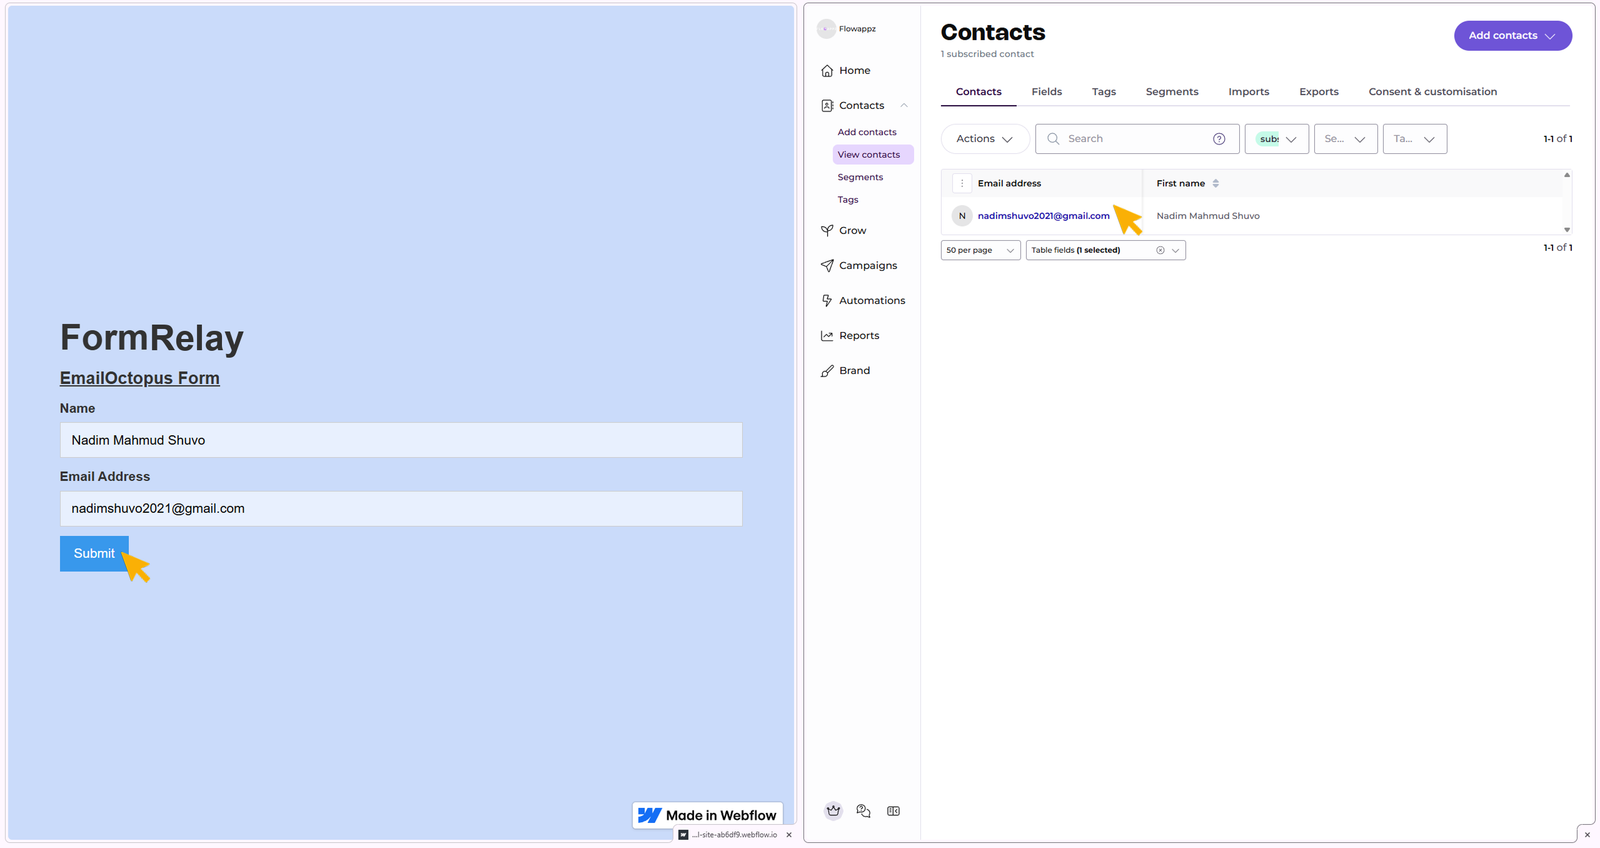
- Go to your published Webflow site.
- Fill out and submit the form.
- You will see the data appear in your EmailOctopus Contacts -> View Contacts within a few seconds.
✅ Your EmailOctopus integration is now successfully set up and ready to sync form submissions.
Still stuck?
Open the site's Logs page in FormRelay. Every attempt is recorded with the destination's own error message, and you can Replay a failed delivery once the cause is fixed. Delivery & Retries explains what the statuses mean.