
FormRelay
Airtable
See the installation steps to learn how to install our app and change the form name
Before you start
- An Airtable base with a table to write into.
- Column types matter: FormRelay writes text into text fields. Collaborator, attachment and formula columns cannot be written to, so map your Webflow fields to text, number, email, phone or single-select columns.
Step 1: Set Up Airtable Integration
- In your App Dashboard, go to the Sites menu and click on your Authorized Webflow Site.
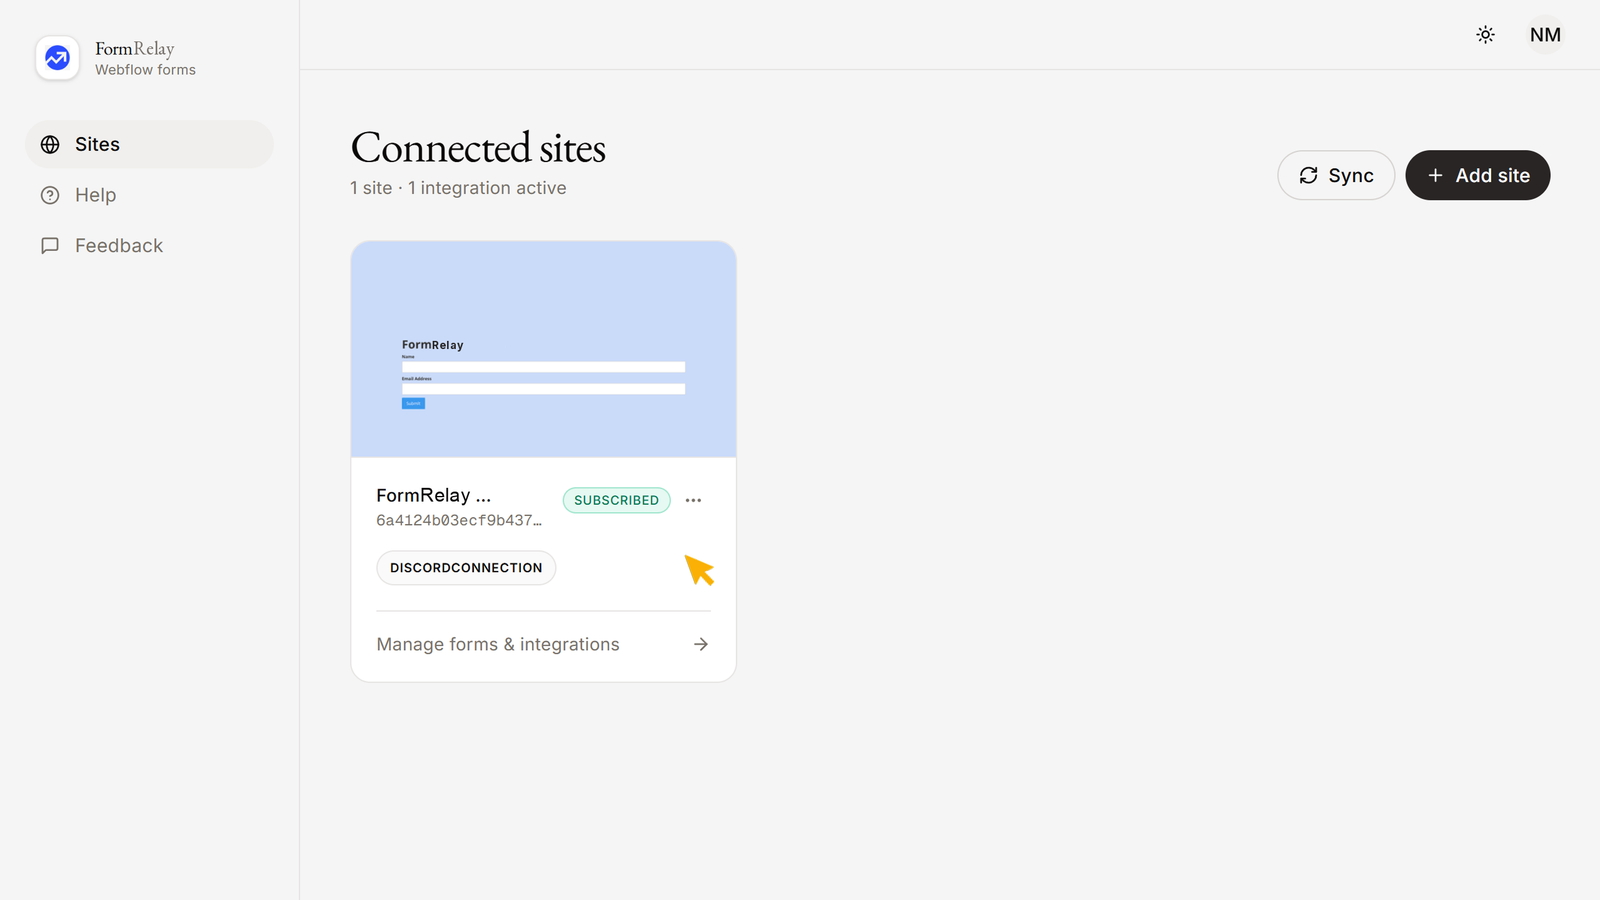
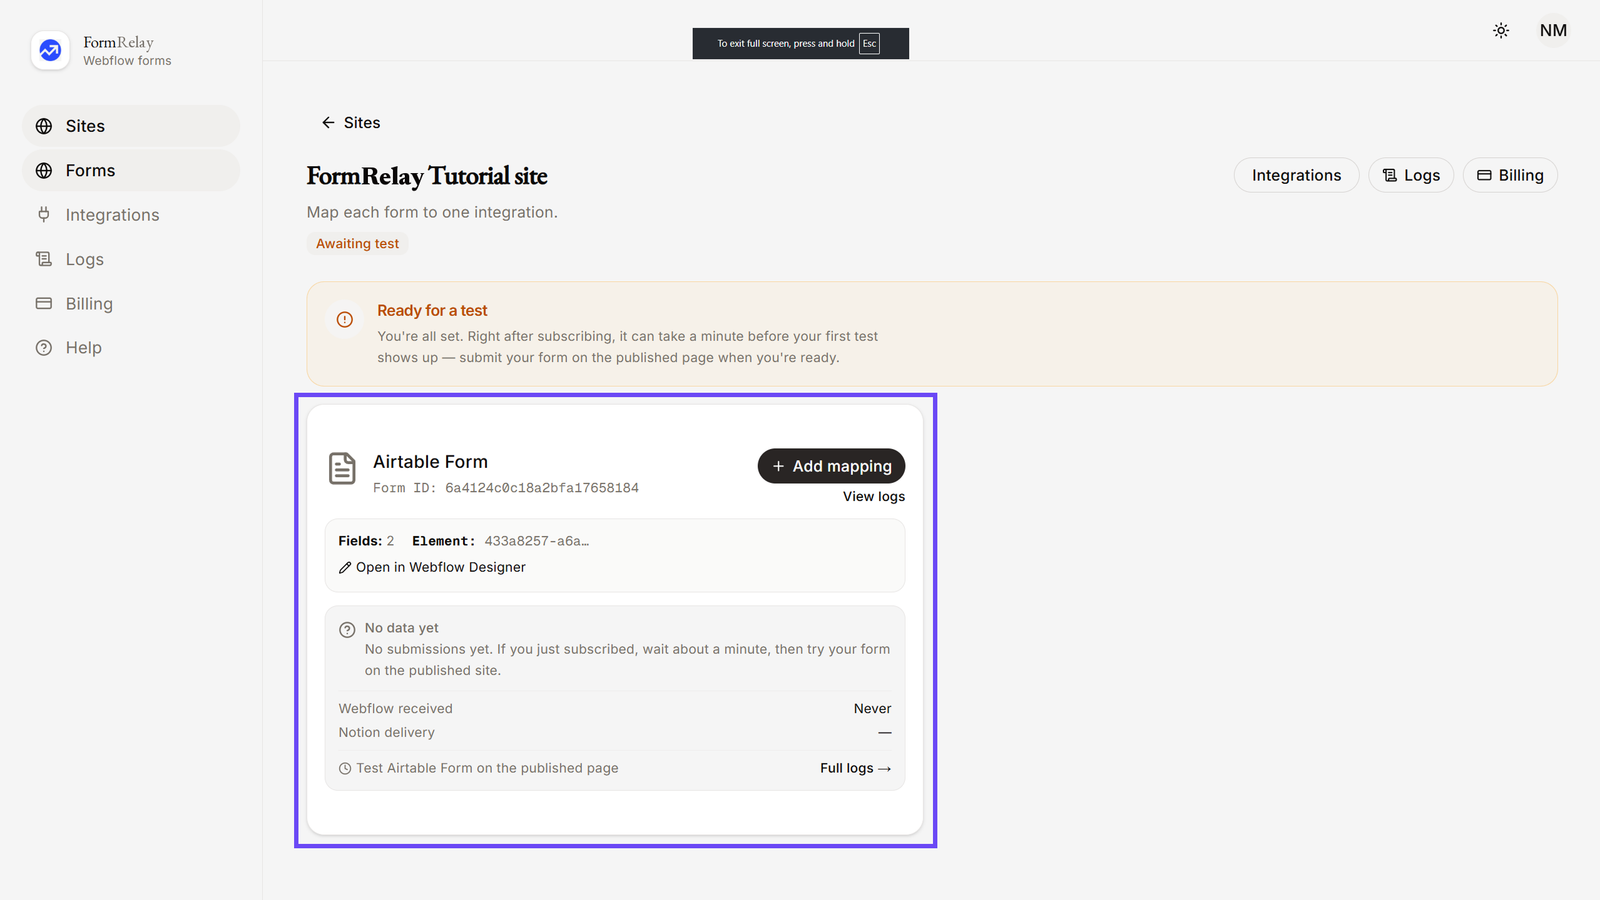
- Here you will see all your forms across the site.
- A form can send to several destinations, but only one of each kind. Adding a second Airtable destination to the same form is not possible; edit the existing one instead.
- From the left-hand menu, click on Integrations. You will see available categories such as:
- Apps & Platforms (Notion, Slack, Discord, Airtable)
- Email & marketing (HubSpot, Mailchimp, Klaviyo, Brevo, MailerLite, EmailOctopus, Moosend, Omnisend, Sender)
- Automation & Webhooks (Webhook, Zapier, Make)
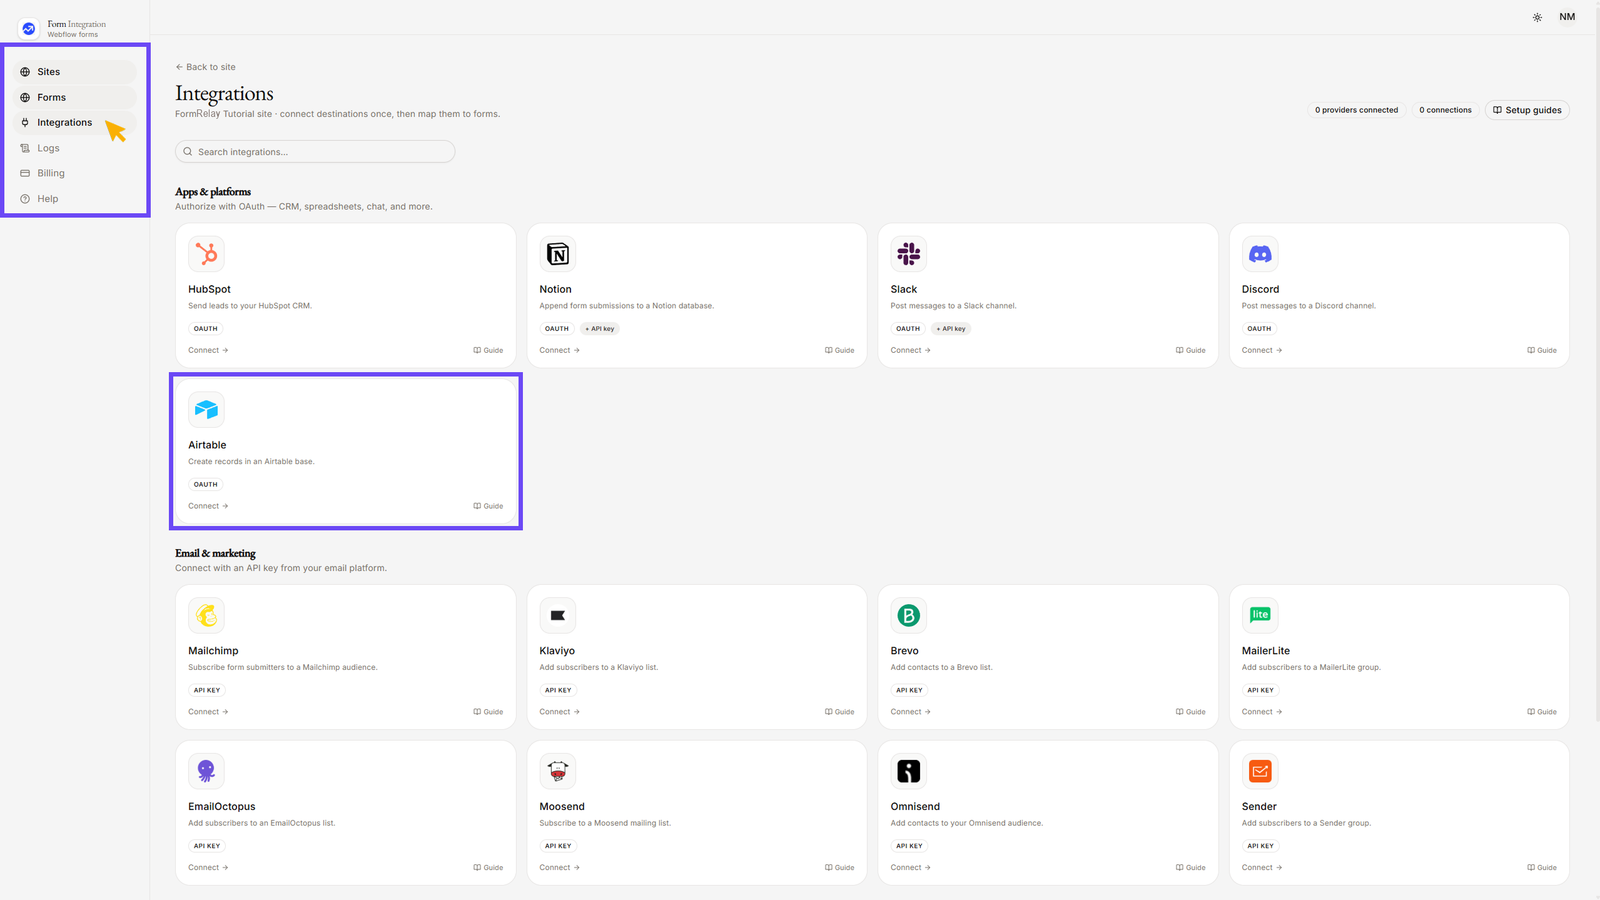
- Under Apps & Platforms, click on Airtable.
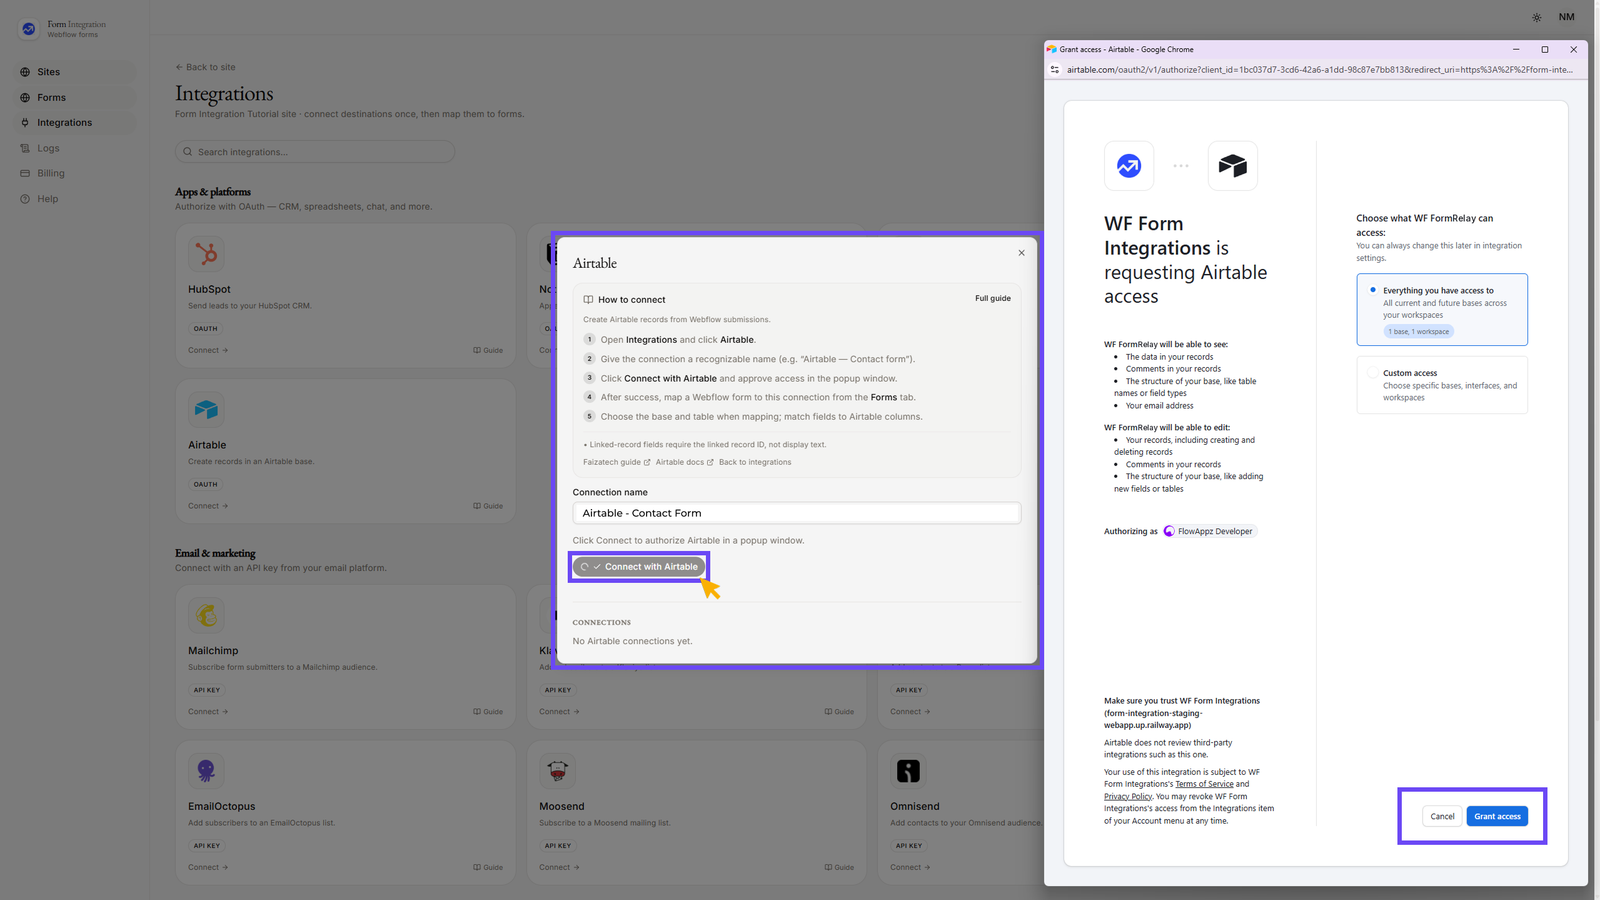
- Give the connection a recognizable name (e.g., “Airtable — Contact Form”).
- Click "Connect with Airtable" and approve access in the popup window. Make sure you are signed in to your Airtable account and have created a database beforehand.
- After successful authorization, your added Airtable integration will appear under "CONNECTIONS".
- You can edit or delete the connection at any time.
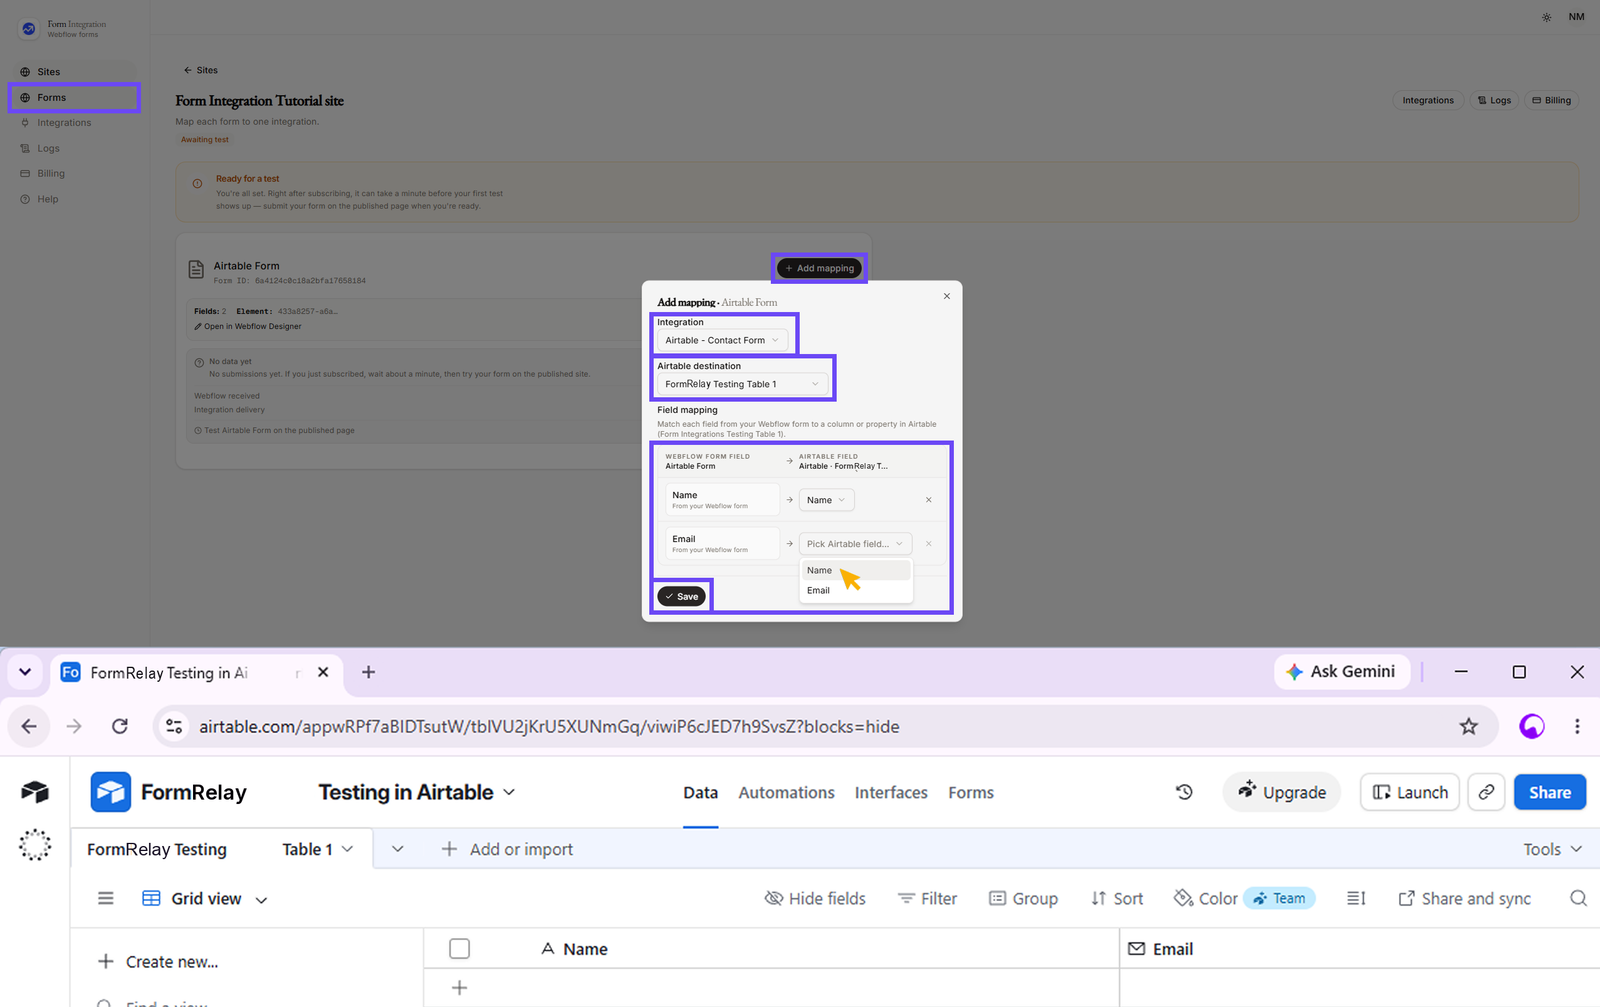
- Go back to the Forms menu.
- Choose a Form from your authorized Webflow site.
- Click "+ Add destination".
- A popup will open with a dropdown for Integration → Pick an integration.
- Select your Airtable integration from the dropdown.
- Configure Field Mapping by matching each field from your Webflow form to a column/property in your Airtable database.
- Click Save when finished.
- Test the integration:
- Go to your published Webflow site.
- Fill out and submit the form.
- You will see the data appear in your Airtable database within a few seconds.
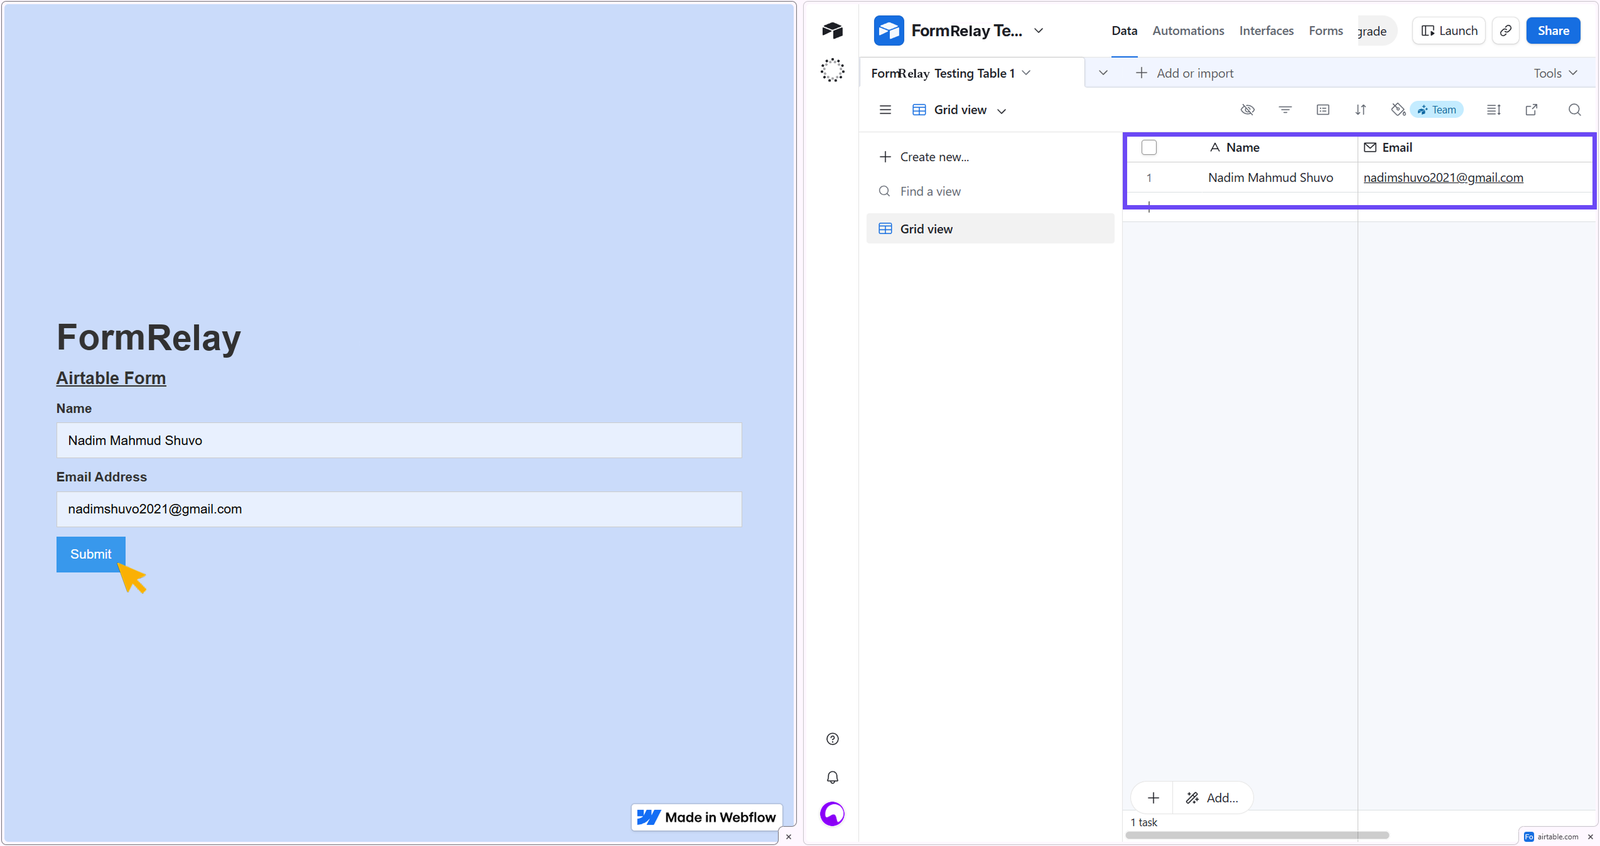
✅ Your Airtable integration is now successfully set up and ready to sync form submissions.
Troubleshooting
| What you see | What it means |
|---|---|
Airtable authorization expired — reconnect Airtable to resume delivery |
Airtable revoked the grant, or it was disconnected on Airtable's side. Reconnect Airtable on the Integrations page; the mapping is kept. |
Still stuck?
Open the site's Logs page in FormRelay. Every attempt is recorded with the destination's own error message, and you can Replay a failed delivery once the cause is fixed. Delivery & Retries explains what the statuses mean.