
Form Integrations
Webhook
See the installation steps to learn how to install our app and change the form name
Send "Form submissions" from your Webflow site to any external URL via a POST request by Webhook.
- In your App Dashboard, go to the Sites menu and click on your Authorized Webflow Site.
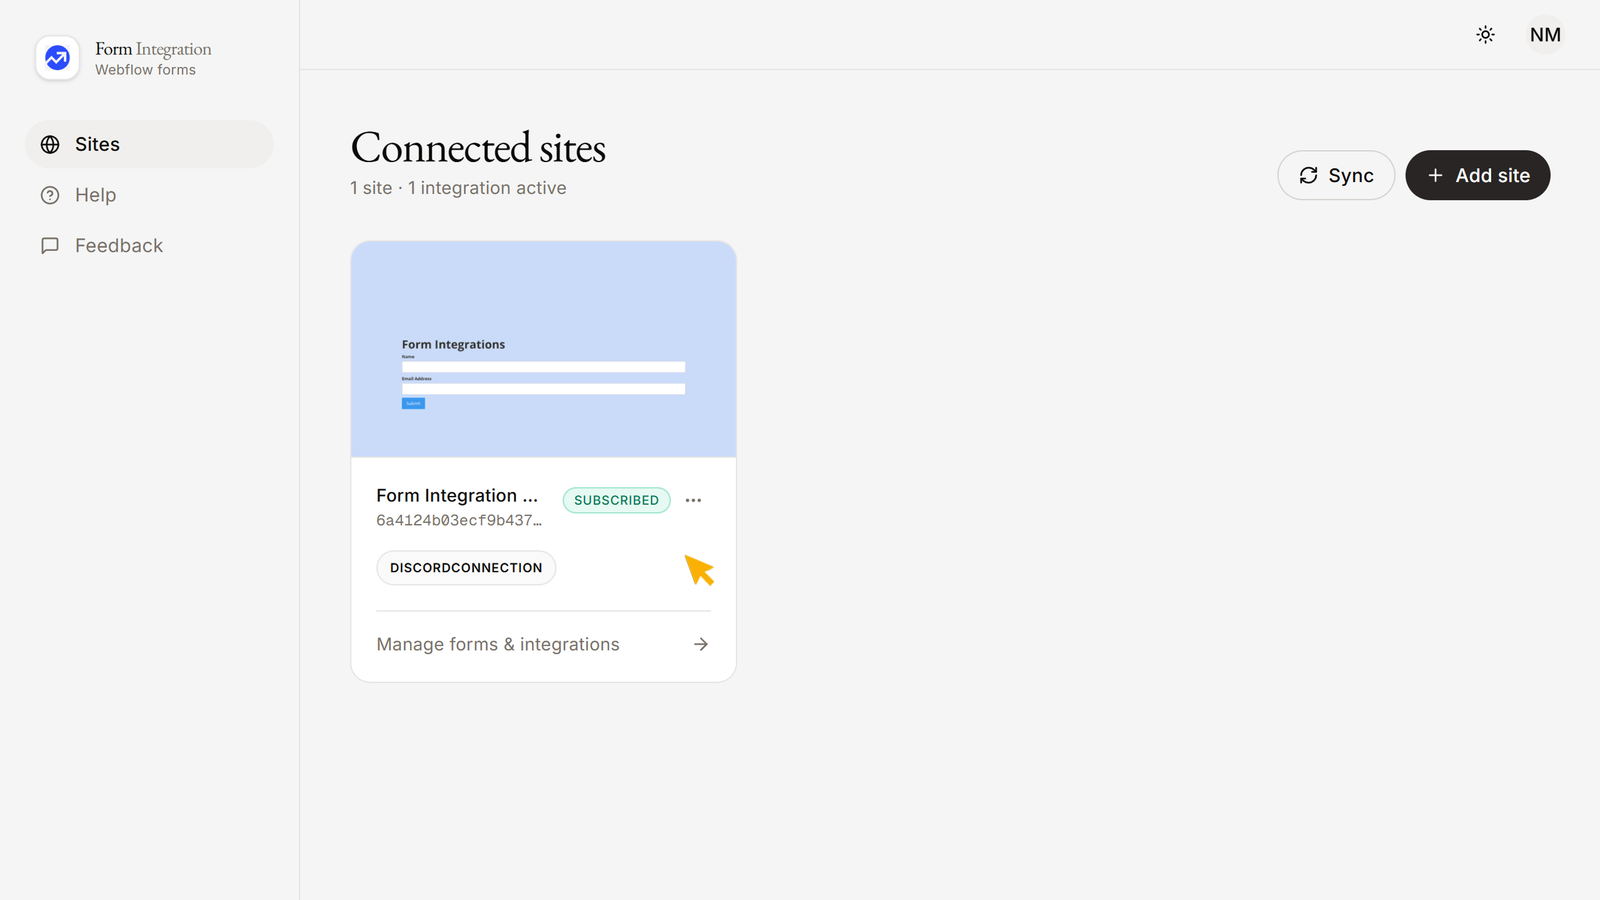
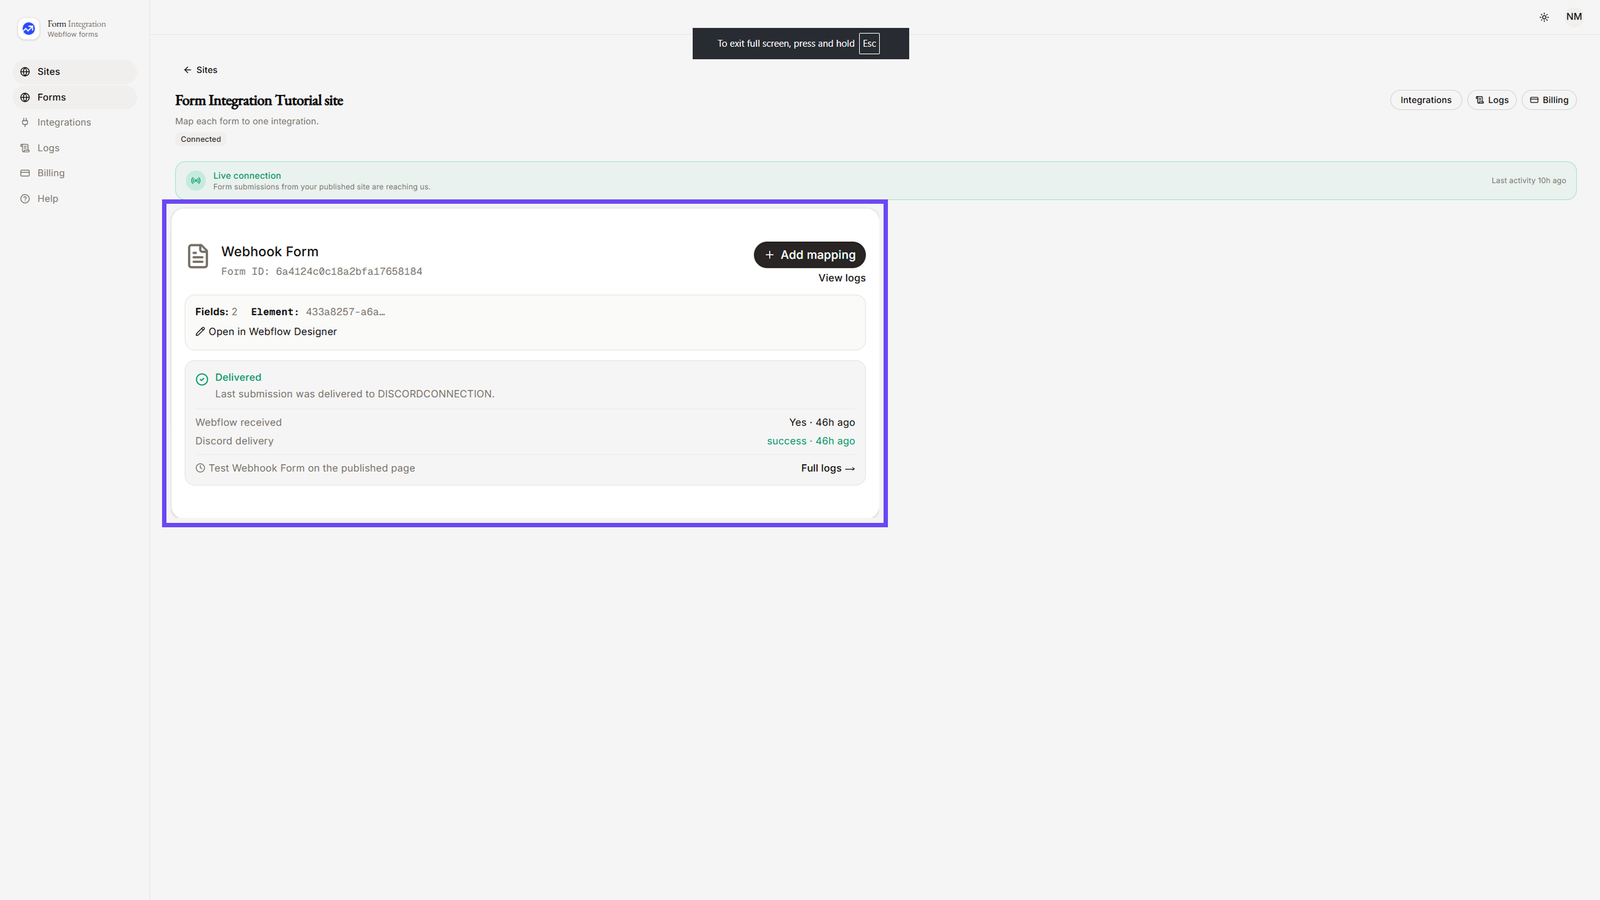
- Here you will see all your forms across the site.
- You can select one form for one integration.
- From the left-hand menu, click on Integrations. You will see available categories such as:
- Apps & Platforms (Hubspot, Notion, Slack, etc.)
- Email & Marketing Tools (Mailchimp, Klaviyo, Brevo, MailerLite, EmailOctopus, etc.)
- Automation & Webhooks (Webhook, Zapier, Make, etc.)
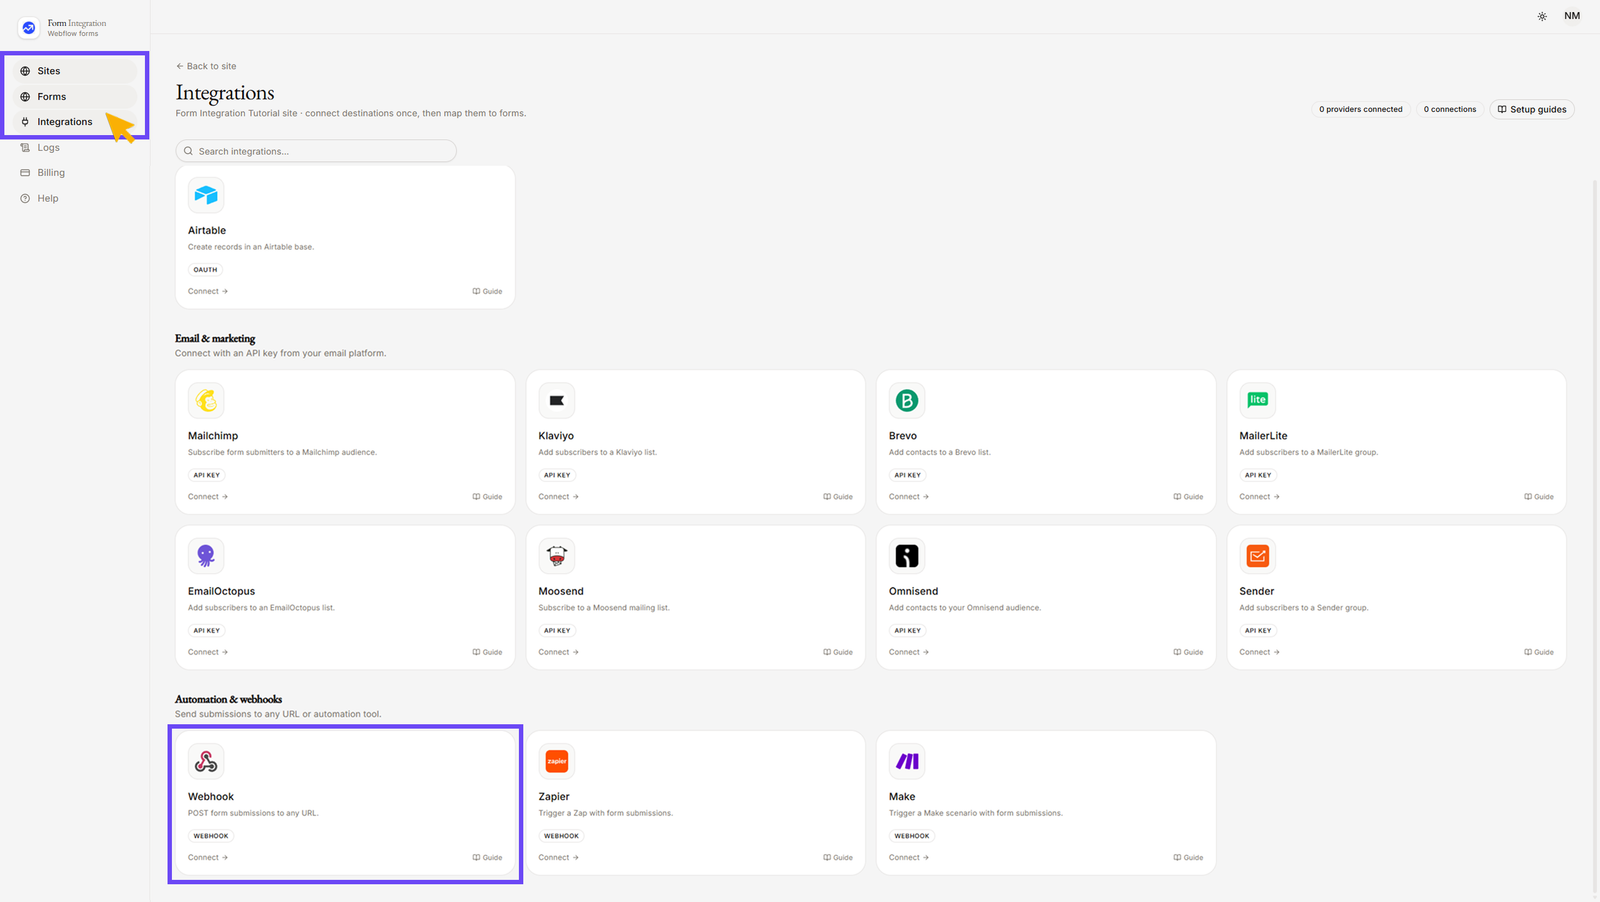
- Under Automation & webhooks, click on Webhook.
- Give the connection a recognizable name (e.g., “Webhook — Staging endpoint”).
- Paste your Webhook URL.
(For details, see section 4: How to get a Webhook URL). - click "Save".
- After clicking "Save", your added Webhook integration will appear under "CONNECTIONS".
- You can edit or delete the connection at any time.
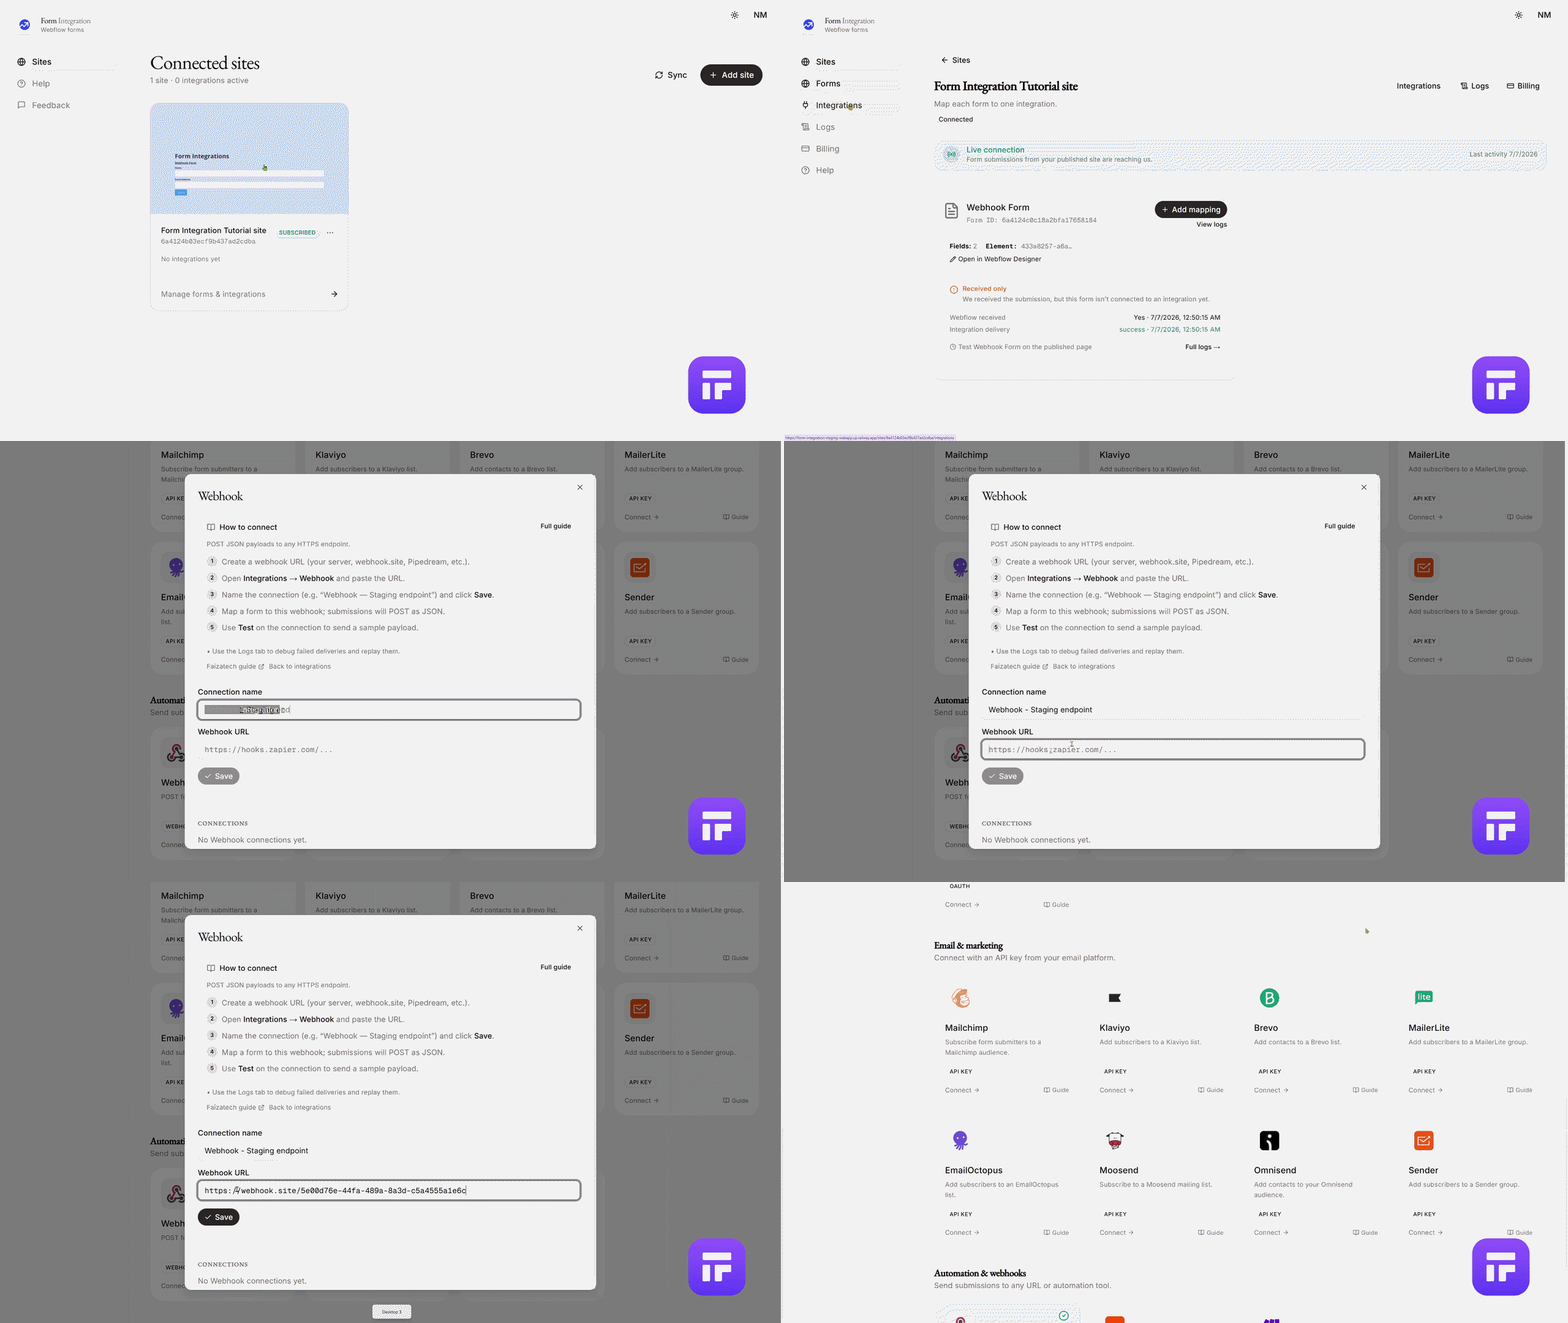
- How to get a Webhook URL.
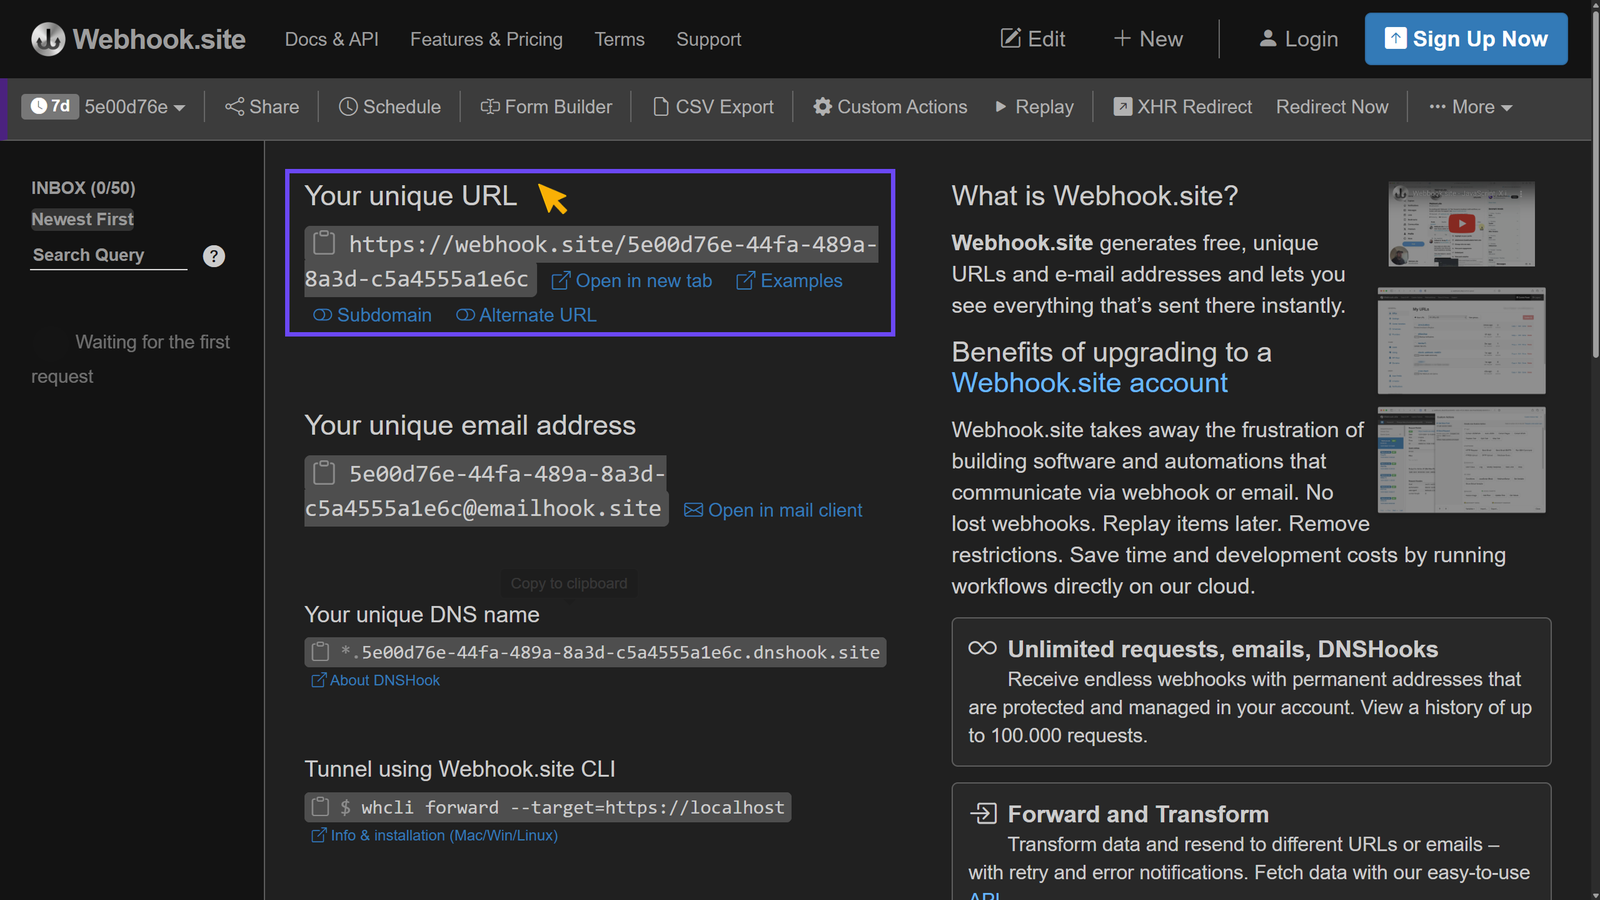
- Go to "Webhook Dashboard", you can either create your own account with a subscription or test the free version.
- In there you will find "Your unique URL", "Your unique email address", "Your unique DNS name", "Tunnel using Webhook.site CLI".
- Copy "Your unique URL" and store it securely — you’ll need it to connect your app.
- Go back to the Forms menu.
- Choose a Form from your authorized Webflow site.
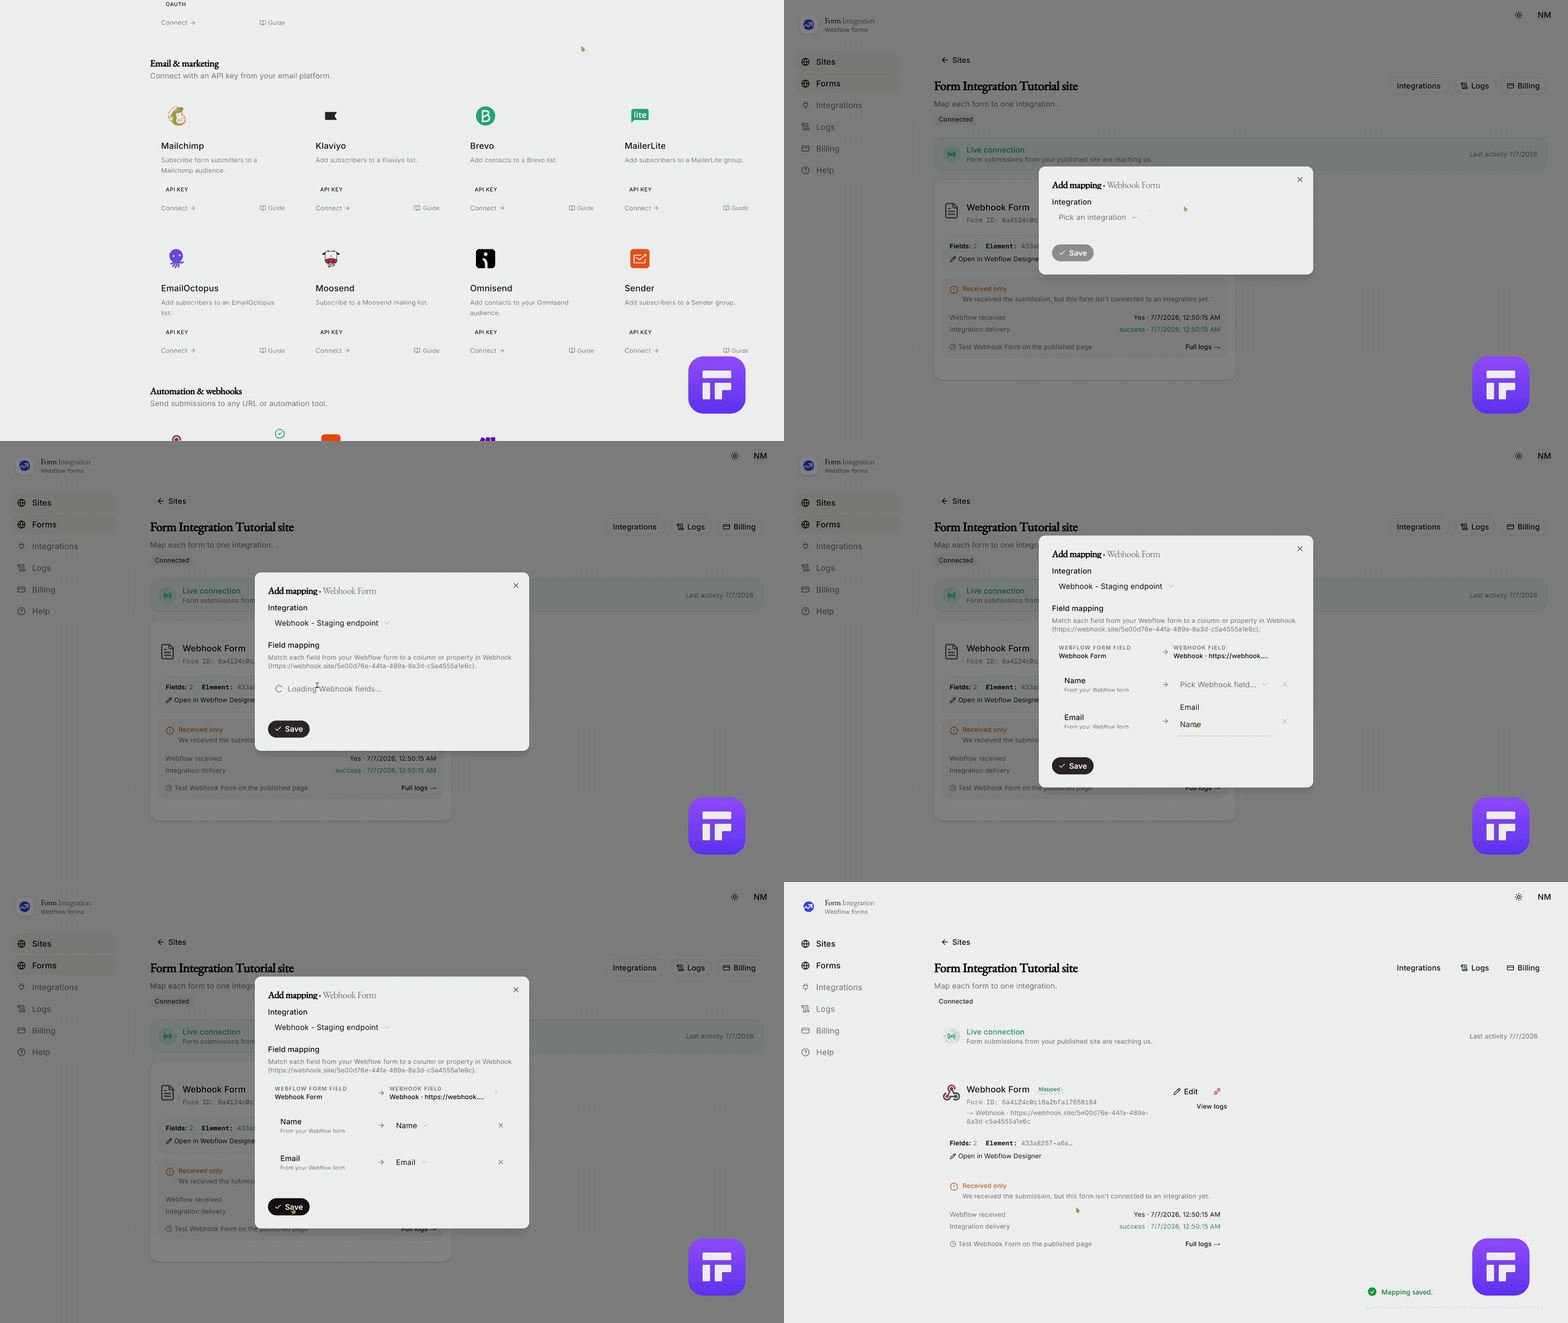
- Click "+ Add Mapping".
- A popup will open with a dropdown for Integration → Pick an integration.
- Select your Webhook integration from the dropdown.
- Configure Field Mapping by matching each field from your Webflow form to a property in your Webhook.
- Click Save when finished.
- Test the integration:
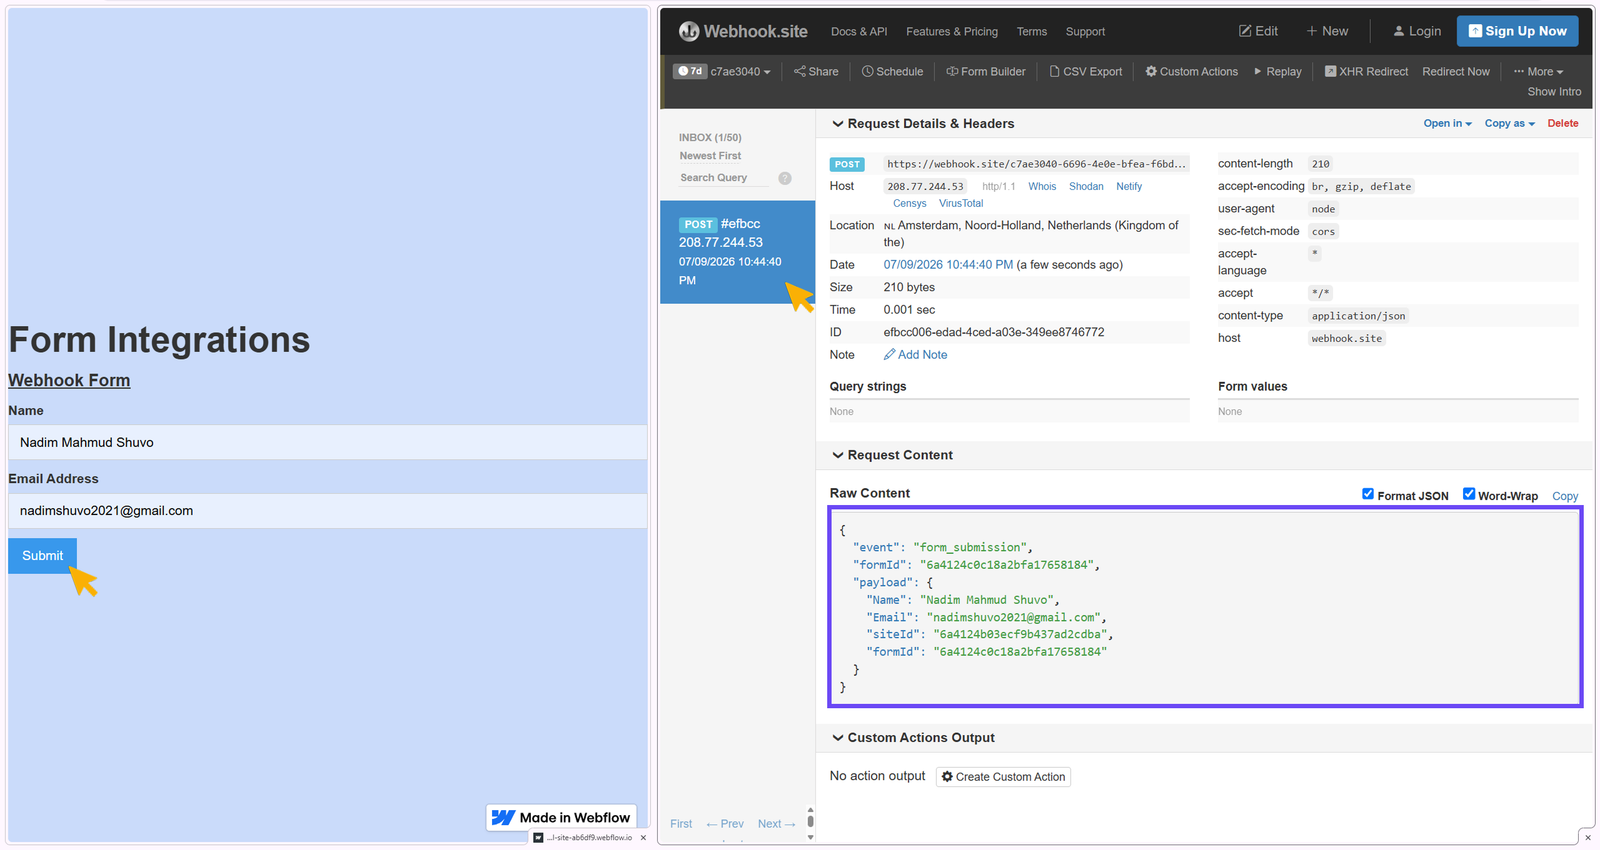
- Go to your published Webflow site.
- Fill out and submit the form.
- You will see the data appear in your Webhook Dashboard immediately.
✅ Your Webhook integration is now successfully set up and ready to sync form submissions.
Payload reference
Live form submission (sent on every real submit):
{
    "event": "form_submission",
    "formId": "<webflow-form-id>",
    "payload": {
        "Name": "Jane Doe",
        "Email": "jane@example.com",
        "siteId": "<webflow-site-id>",
        "formId": "<webflow-form-id>"
    }
}
- Sent as
POSTwith"Content-Type": application/json. - Field keys in
payloaduse Webflow field display names.
Test payload (sent when you click the play icon on a saved connection):
{
    "test": true,
    "source": "flowappz-form-integration",
    "fields": {
        "Name": "Test User",
        "Email": "test@example.com",
        "Message": "Hello from Flowappz"
    },
    "submittedAt": "2026-01-01T00:00:00.000Z"
}
- Includes header
x-flowappz-test: 1.
Troubleshooting
| Issue | What to do |
|---|---|
| License required | Activate a license on the site page before mapping forms. |
| Webhook missing — click to fix | Click the badge to re-register the Webflow → app webhook. |
| No integrations yet — add one from the Integrations page first. | Add a Webhook connection under Integrations before mapping. |
| Test sent shows a non-200 status | Check that your endpoint accepts POST with application/json. |
| Logs show failed for Webhook | Verify the URL is reachable and returns a successful response. |