
Form Integrations
Make
See the installation steps to learn how to install our app and change the form name
Trigger a Make scenario when someone submits a form on your Webflow site.
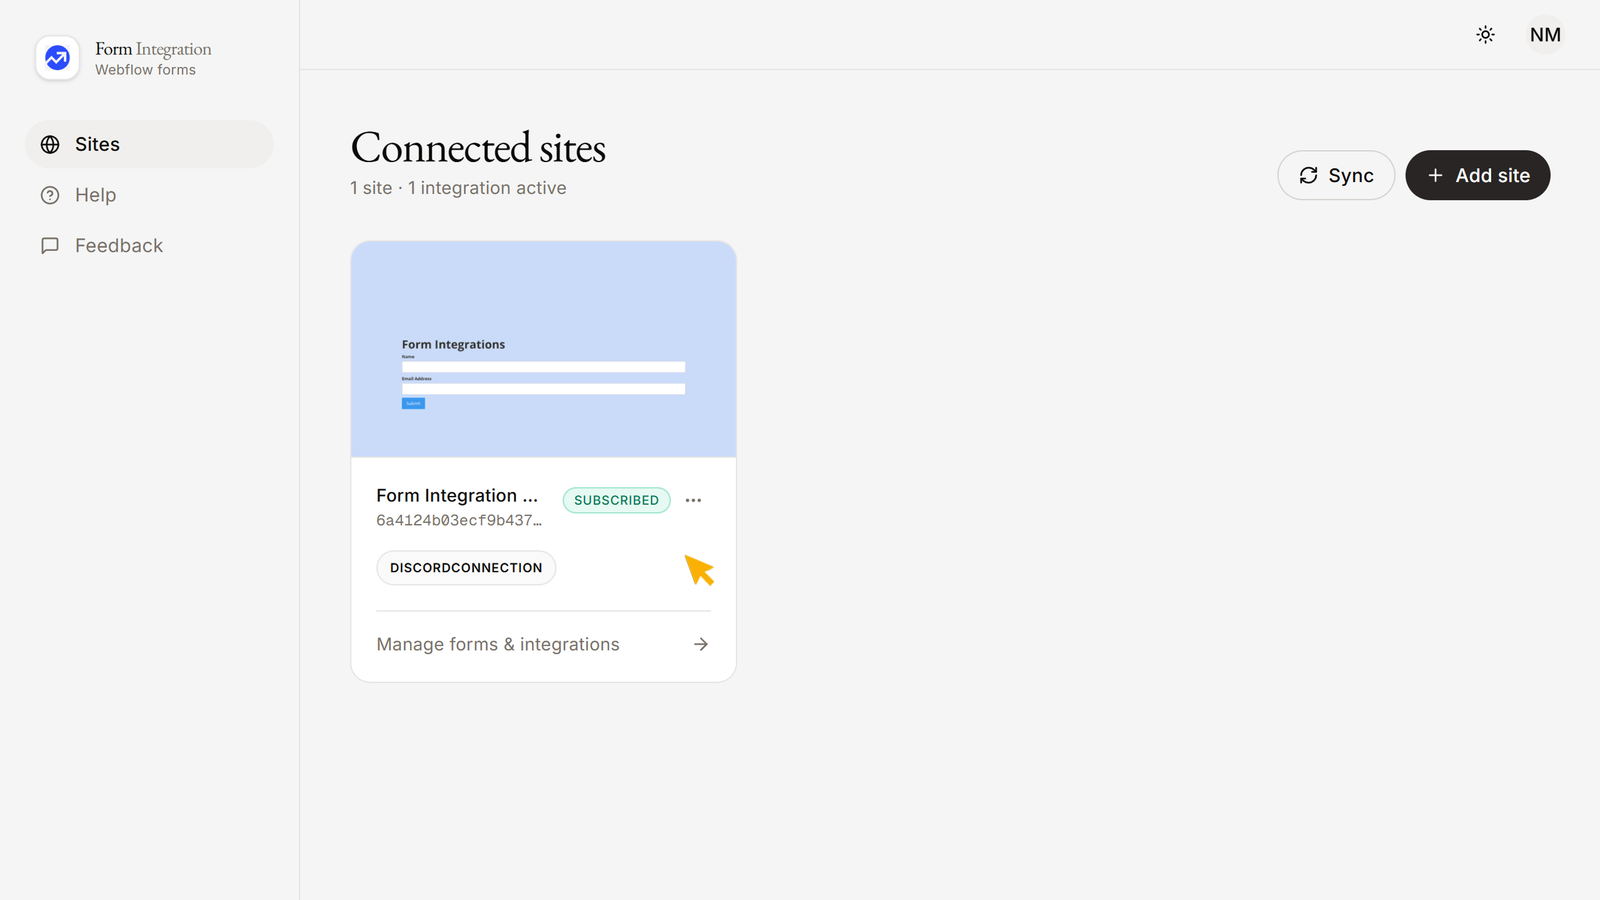
- In your App Dashboard, go to the Sites menu and click on your Authorized Webflow Site.
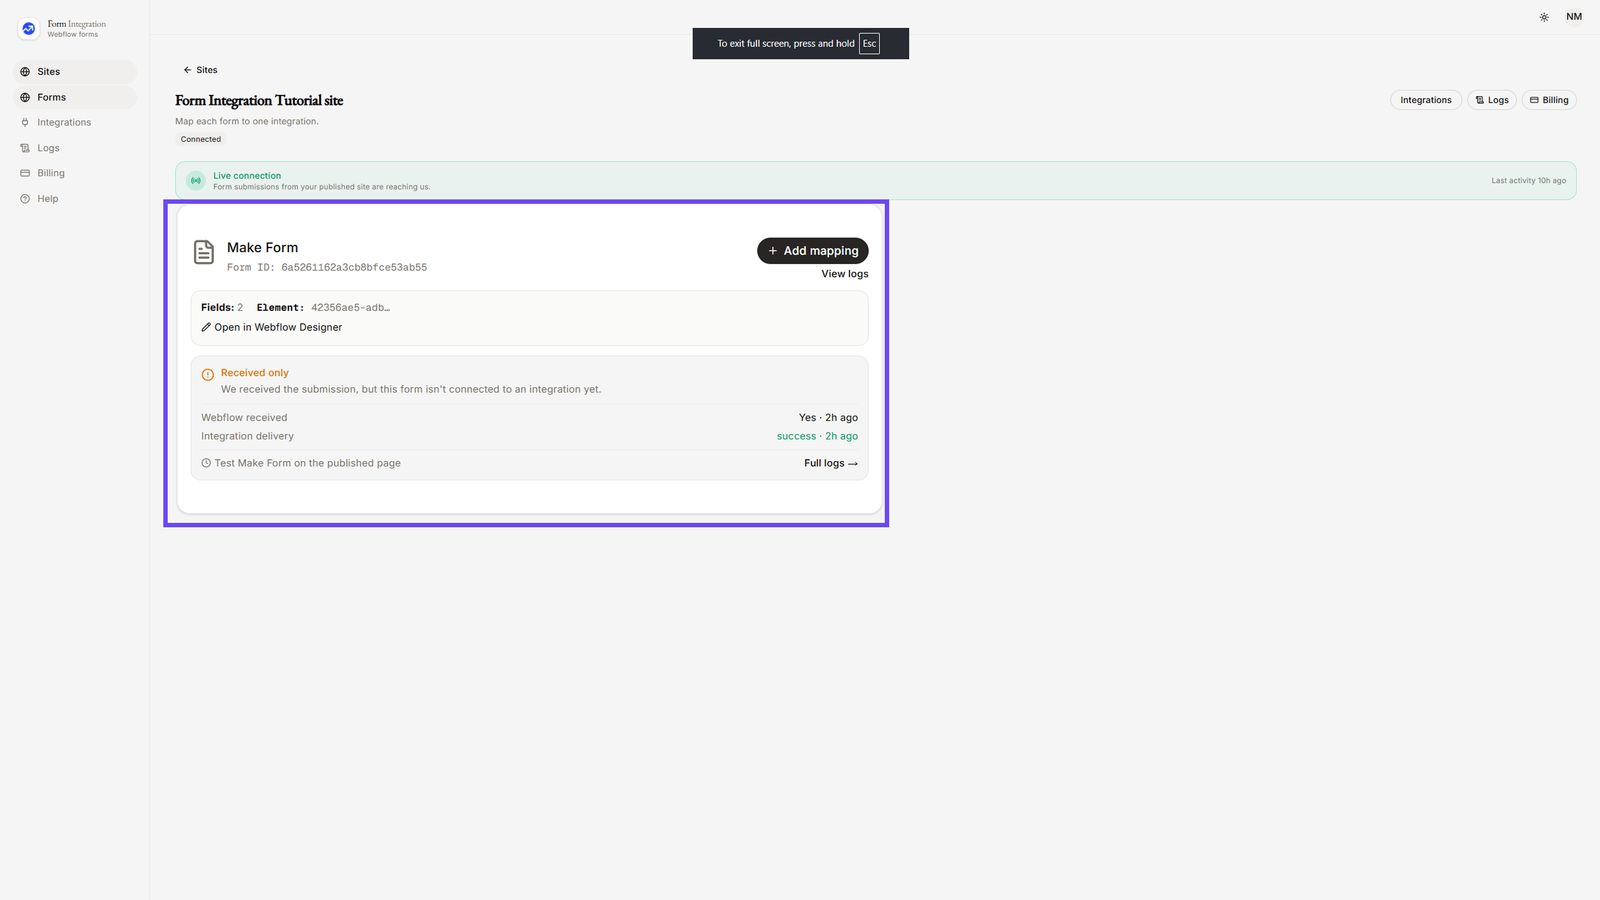
- Here you will see all your forms across the site.
- You can select one form for one integration.
- From the left-hand menu, click on Integrations. You will see available categories such as:
- Apps & Platforms (Hubspot, Notion, Slack, etc.)
- Email & Marketing Tools (Mailchimp, Klaviyo, Brevo, MailerLite, EmailOctopus, etc.)
- Automation & Webhooks (Webhook, Zapier, Make, etc.)
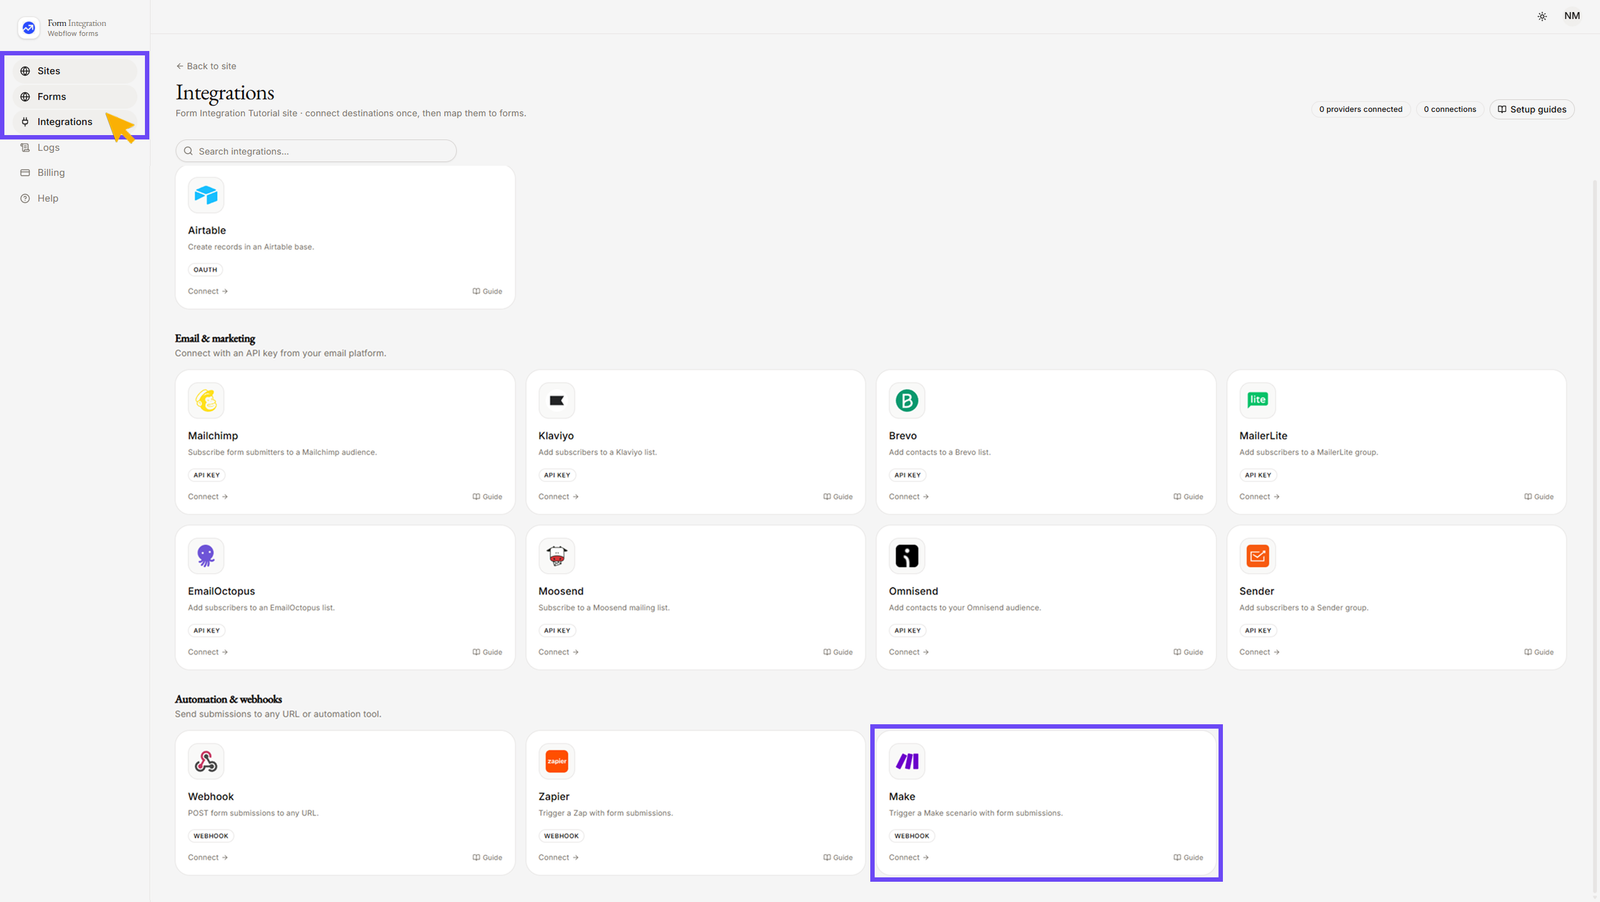
- Under Automation & webhooks, click on Make.
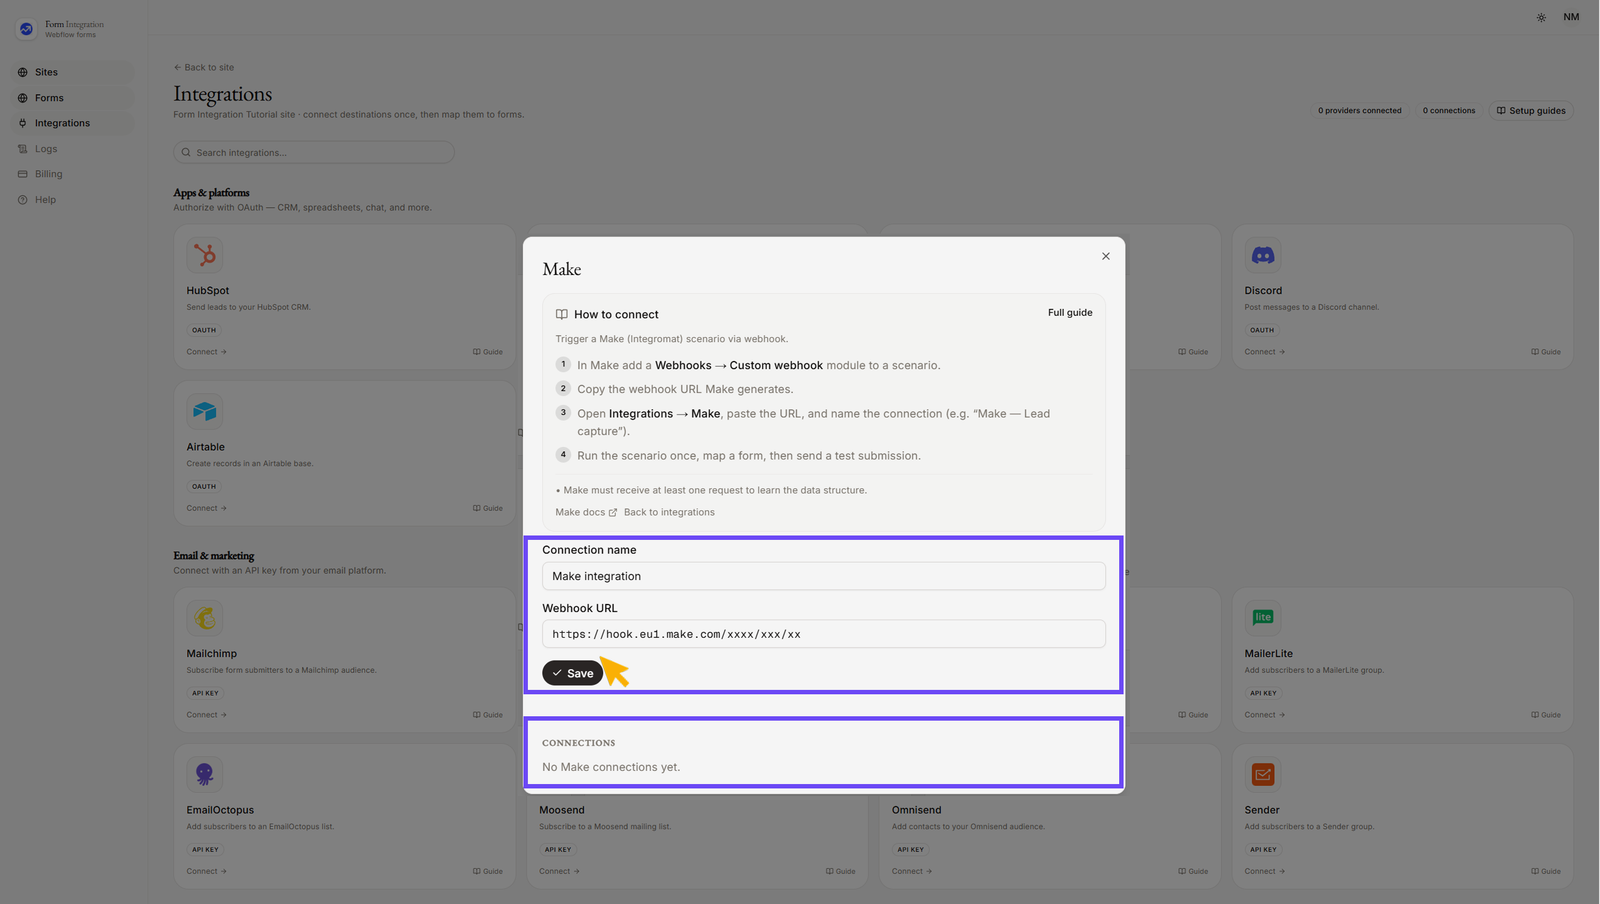
- Give the connection a recognizable name (e.g., “Make — Lead capture”).
- Paste your Webhook URL — your Make custom webhook URL (e.g.
https://hook.eu1.make.com/...).
(For details, see section 4: How to get your Make Webhook URL). - click "Save".
- After clicking "Save", your added Webhook integration will appear under "CONNECTIONS".
- You can edit or delete the connection at any time.
- How to get your Make Webhook URL.
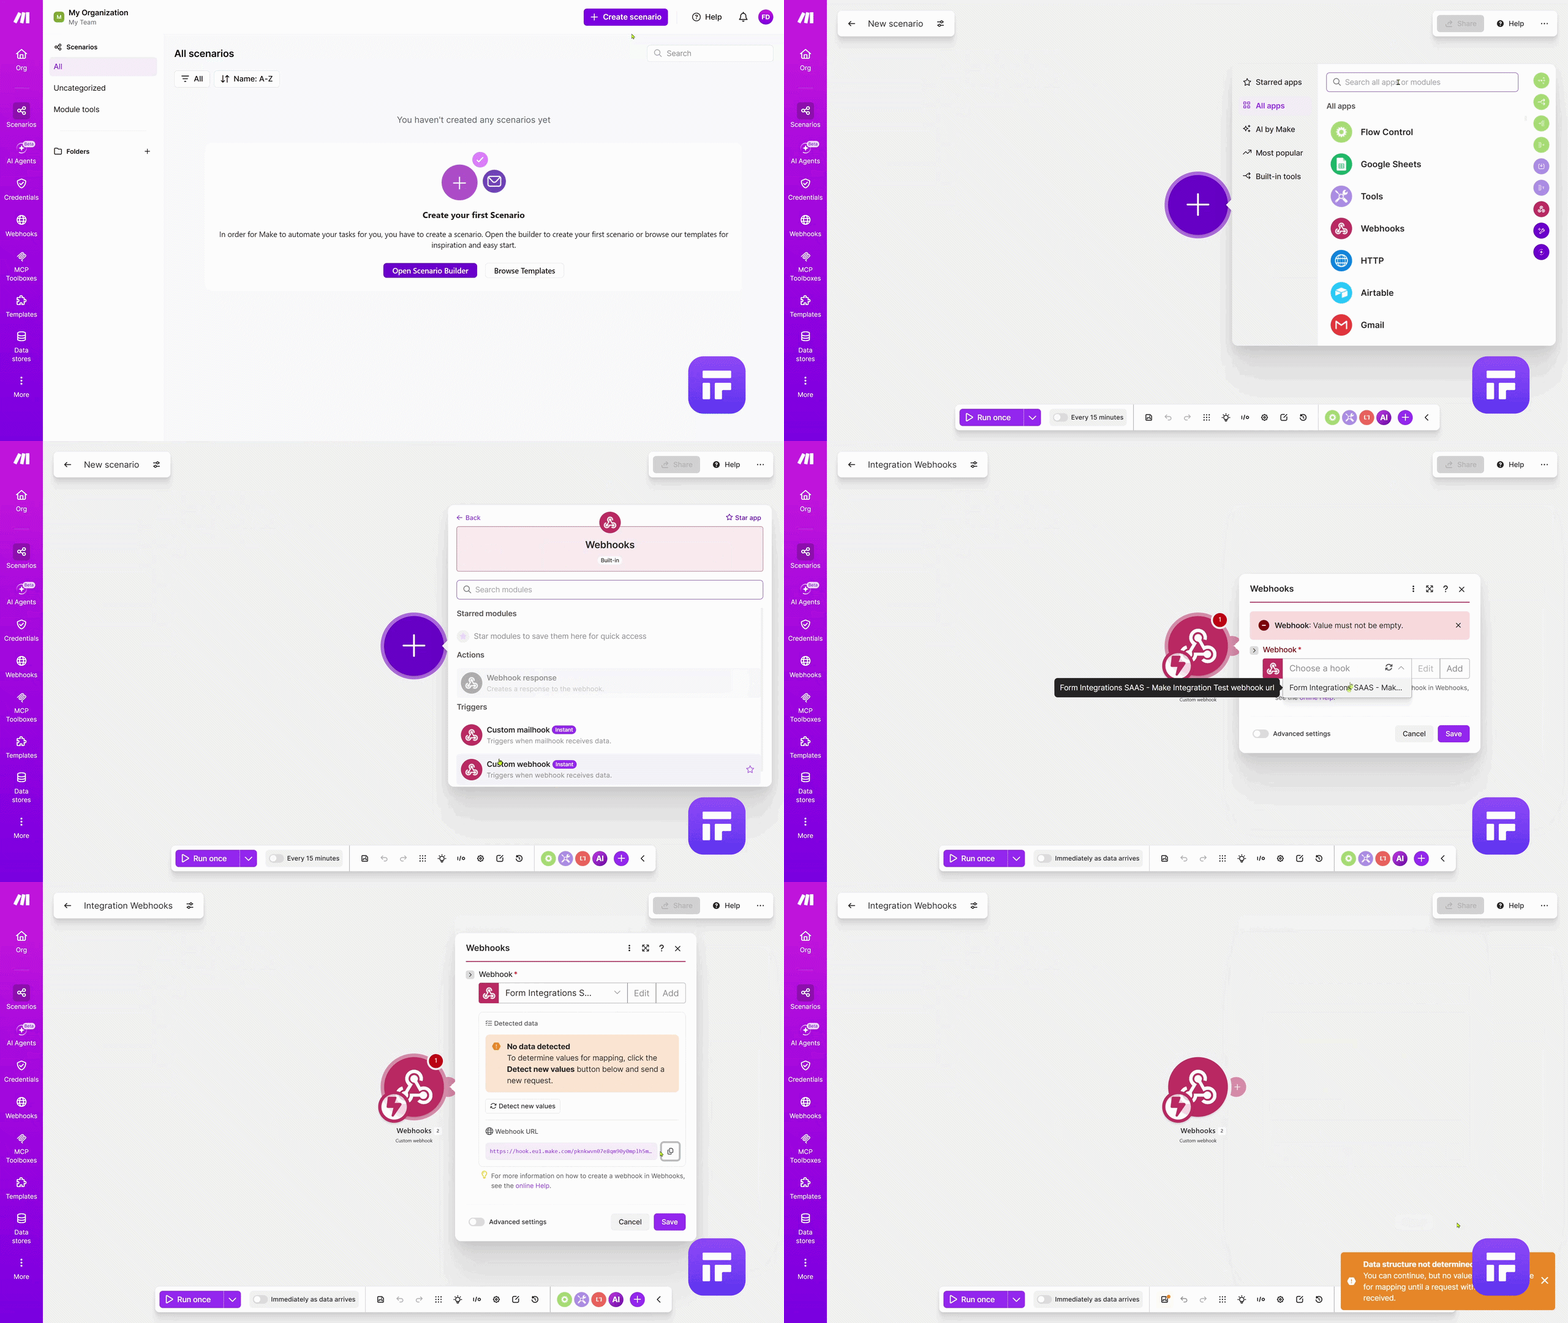
- Go to your "Make Dashboard", you can either create your own account with a subscription or test the free version.
- In there click "+ Create scenario" and give the scenario a recognizable name.
- Click the "+" icon to add the first module.
- Search for and select Webhooks, then choose Custom webhook.
- Click Create a webhook (or Add) to generate your unique webhook URL.
- Copy the URL shown in the module (e.g.
https://hook.eu1.make.com/...). - Paste it into the Webhook URL field in the Form Integrations app -> Integrations -> Make.
- Keep the scenario editor open (do not activate yet) — you will send a test submission from your Form to complete the scenario setup.
- Go back to the Forms menu.
- Choose a Form from your authorized Webflow site.
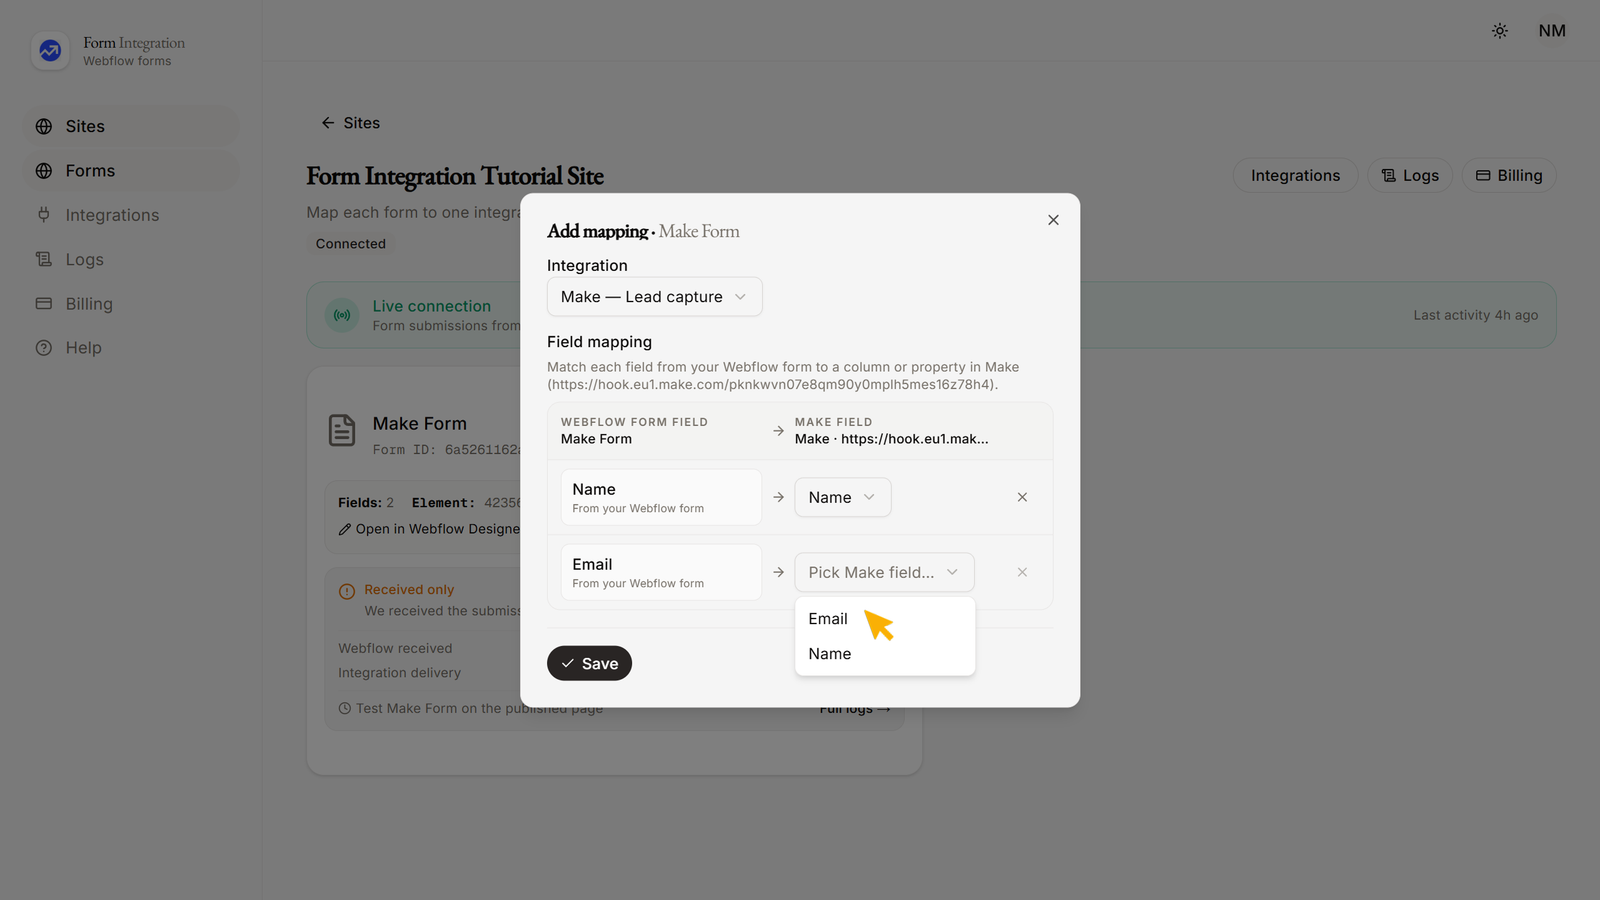
- Click "+ Add Mapping".
- A popup will open with a dropdown for Integration → Pick an integration.
- Select your Make integration from the dropdown.
- Configure Field Mapping by matching each field from your Webflow form to a property in your Make.
- Click Save when finished.
- Test the integration:
- Go to your published Webflow site.
- Fill out and submit the form.
- You will see the data appear in your Make Dashboard immediately.
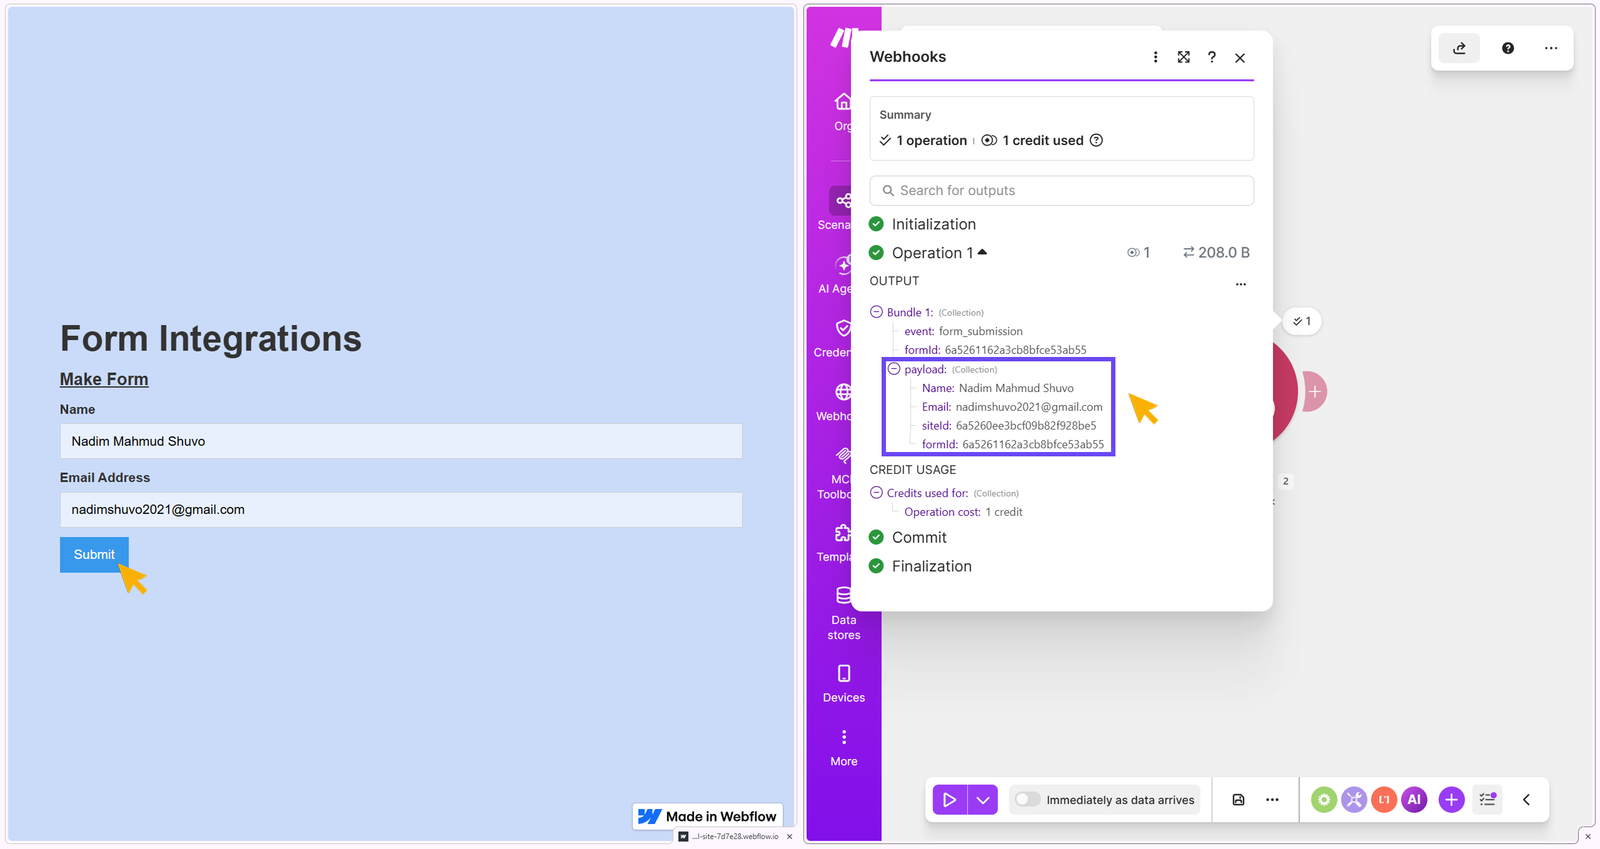
✅ Your Make integration is now successfully set up and ready to sync form submissions.
Payload reference
Live form submission (sent on every real submit):
{
    "event": "form_submission",
    "formId": "<webflow-form-id>",
    "payload": {
        "Name": "Jane Doe",
        "Email": "jane@example.com",
        "siteId": "<webflow-site-id>",
        "formId": "<webflow-form-id>"
    }
}
- Sent as
POSTwithContent-Type: application/json. - Field keys in
payloaduse Webflow field display names.
Unlike the generic Webhook integration, Make does not support the play-icon test in the connection dialog. Verify by submitting a real form on your published site.
Troubleshooting
| Issue | What to do |
|---|---|
| License required | Activate a license on the site page before mapping forms. |
| Webhook missing — click to fix | Click the badge on the site page to re-register the Webflow → app webhook. |
| No integrations yet — add one from the Integrations page first. | Add a Zapier connection under Integrations before mapping. |
| Zap does not trigger | Submit the form on your published site, then click Test trigger in the Zap editor. |
| Logs show failed for Zapier | Verify the Zapier Catch Hook URL is correct and the Zap is saved. |